Dext has recently released the best bank statement conversion tool for importing bank statements into accounting systems to circumvent the tedious process of preparing Excel files and getting it ready for importing.
Looking back now, it was not easy.
I have previously shown you how to convert PDF bank statements to Excel files by utilising Dext Cloud Software. This is helpful for importing bank statements into your accounting system. In the past during the import process there was still a missing link and that link was the need to adjust and prepare the Excel file to be ready for importing the data into your accounting software.
If you had little or no experience with data importing this was quite a cumbersome and time consuming process.
What I think of the update (In a nutshell).
Dext has updated the PDF bank conversion feature with new enhancements. I think this new update by Dext will propel the accounting industry into an easier, quicker and more effective solution when you have to process large amounts of bank statements from PDF files.

I have used the Dext Bank Statement conversion feature myself, and I must say: My mind is blown away by how Dext has solved this problem and how easy they have made getting bank transactions into accounting software for us.
In this article and video you can see for yourself:
- how I test the Dext system and
- apply their solutions to a project that I am working on.
- By following my content you can judge for yourself whether this feature has saved me time and increased my efficiency.
The typical scenario: You receive a PDF bank statement.
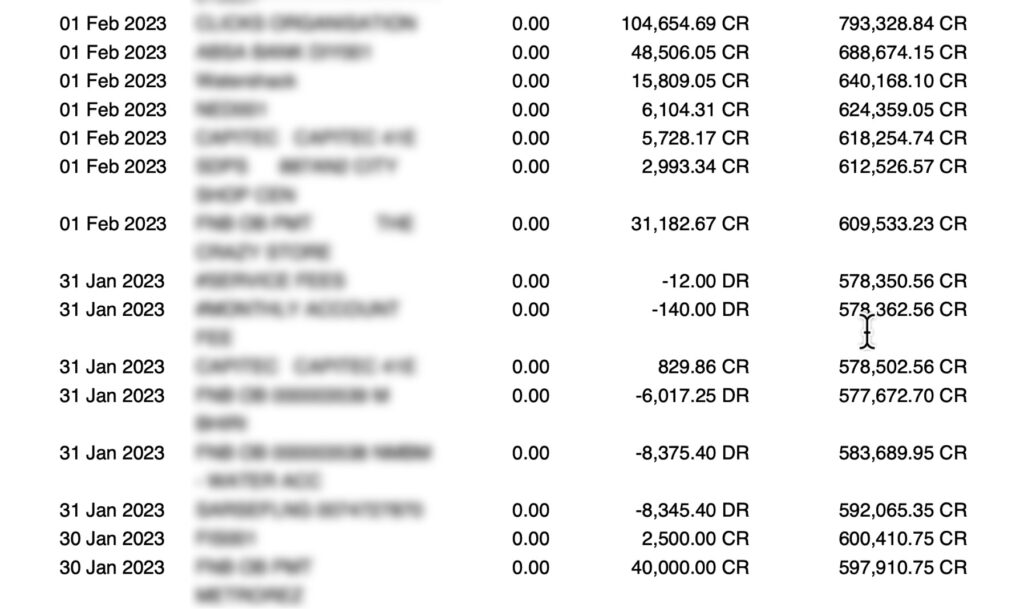
On my screen is a bank statement that contains transactions that I want to bring into my accounting system. You will know by now that I hate to waste time manually entering transactions. Fortunately Dext came to the rescue.
The Dext value proposition.
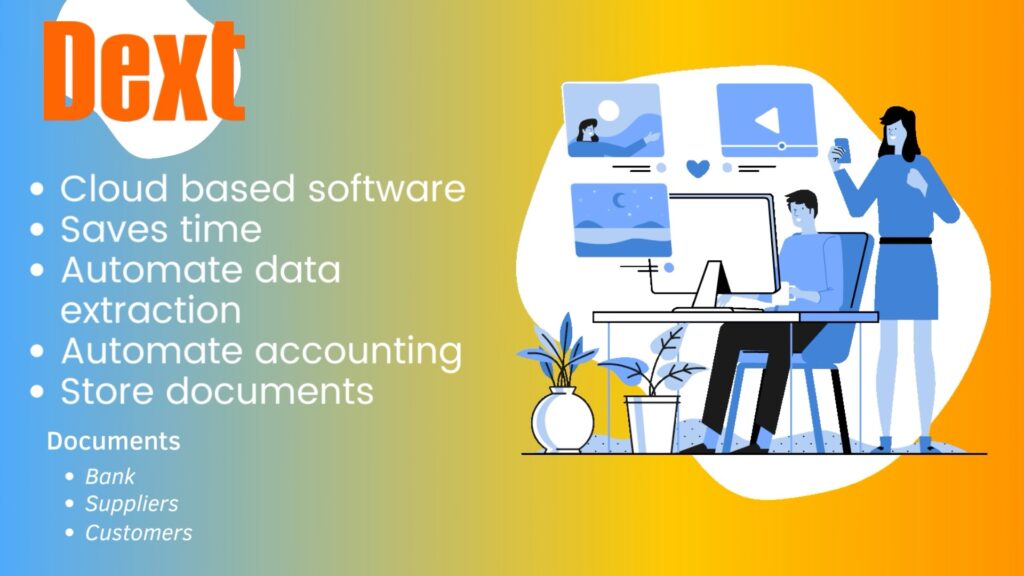
For those people that don’t know anything about Dext. Dext is:
- a cloud based software solution that saves time by automating data extraction of bank, supplier or customer documents, then
- connecting the data to your accounting software where it is seamlessly converted and processed.
- Dext also stores the documents online for convenient retrieval.
This software is fantastic for both business owners and their accountants.
10 Steps to perform a bank statement extraction on Dext.
Here are the 10 steps to upload a PDF-bank statement for data extraction.
- You log into Dext with a user E-mail and password. You will see your business records.
- Go to “Add Documents” at the top of the screen.
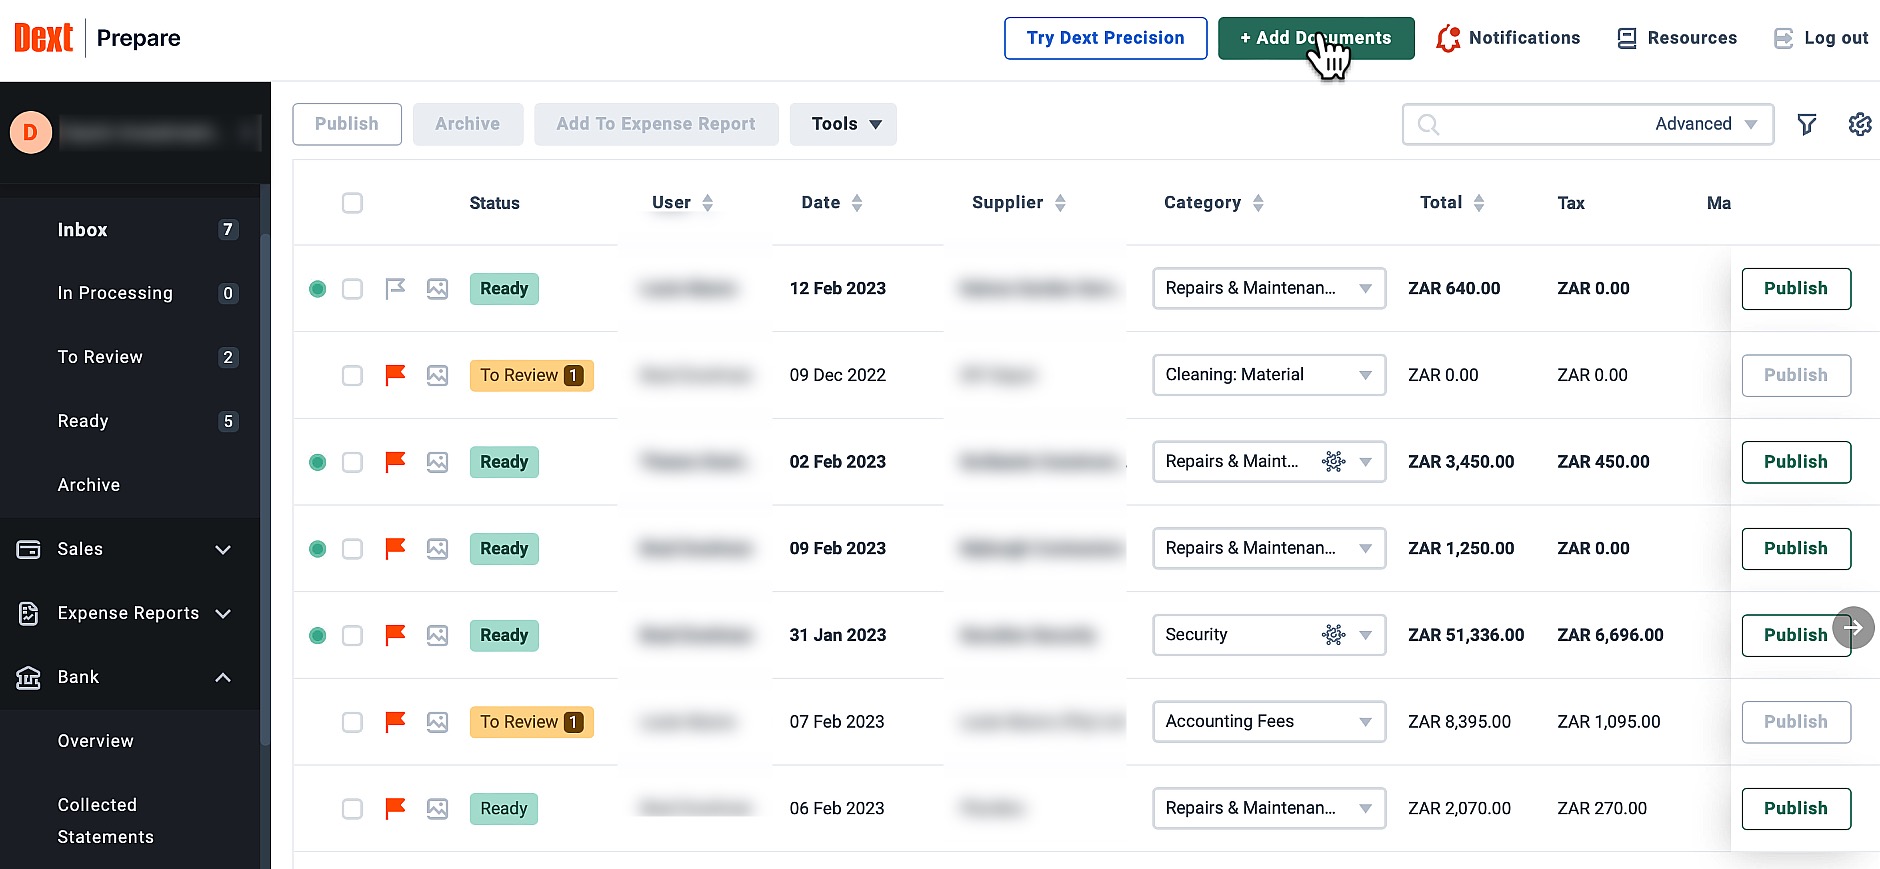
- A sub-menu opens where you can choose the type of document to be uploaded. For this workflow select the bank.
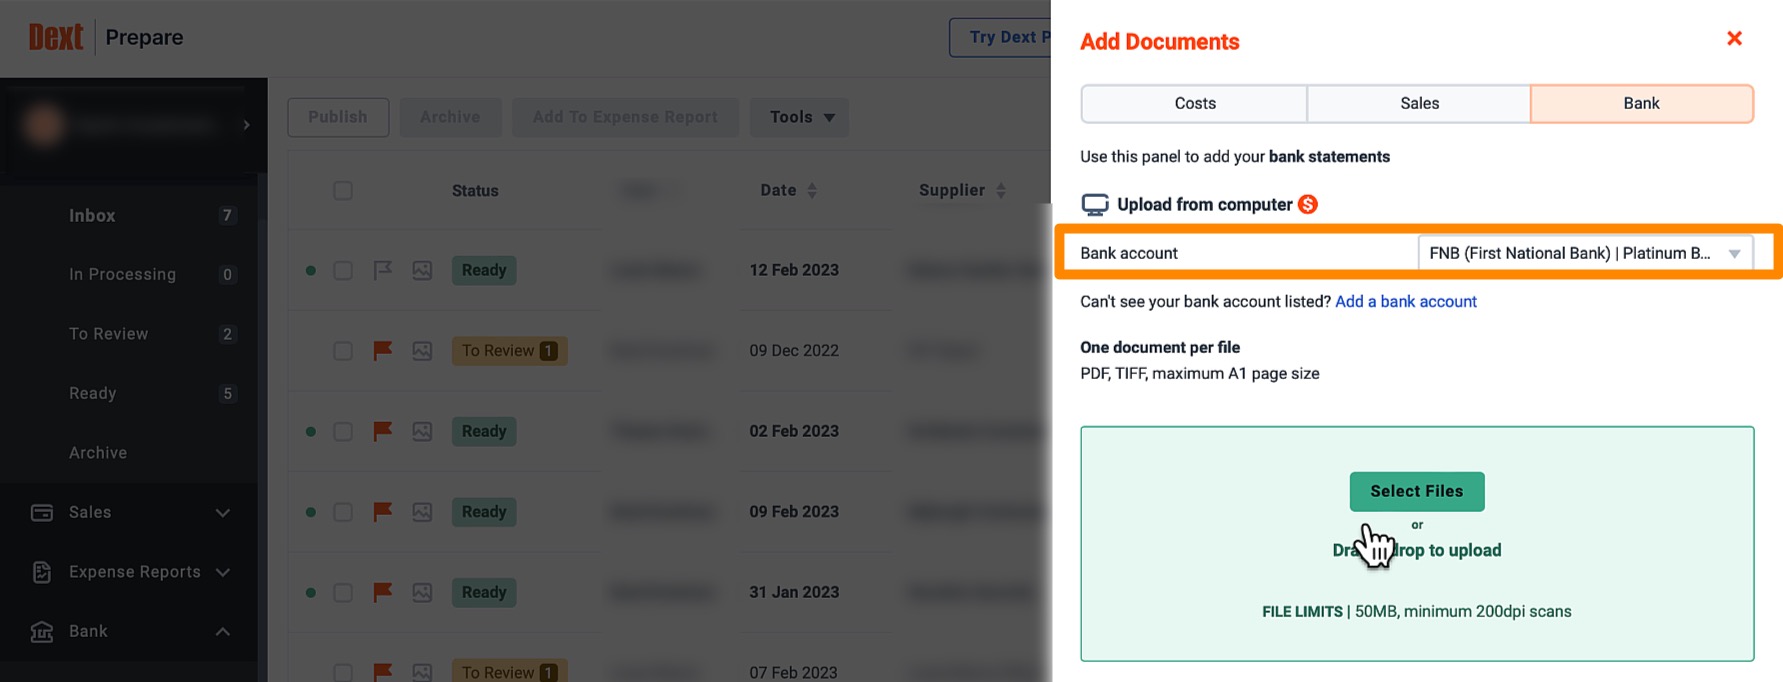
- Then accept the charges. Dext charges a fee per sheet of data to be extracted or as part of a pre-paid bundle if you have purchased it.
I prefer to pay a small amount for data extractions as opposed to paying for the time spent by someone labouring to enter transactions one-by-one. It is simply too costly to do bank processing by hand. - Note that you must have a bank account added on the Dext system before you can proceed.
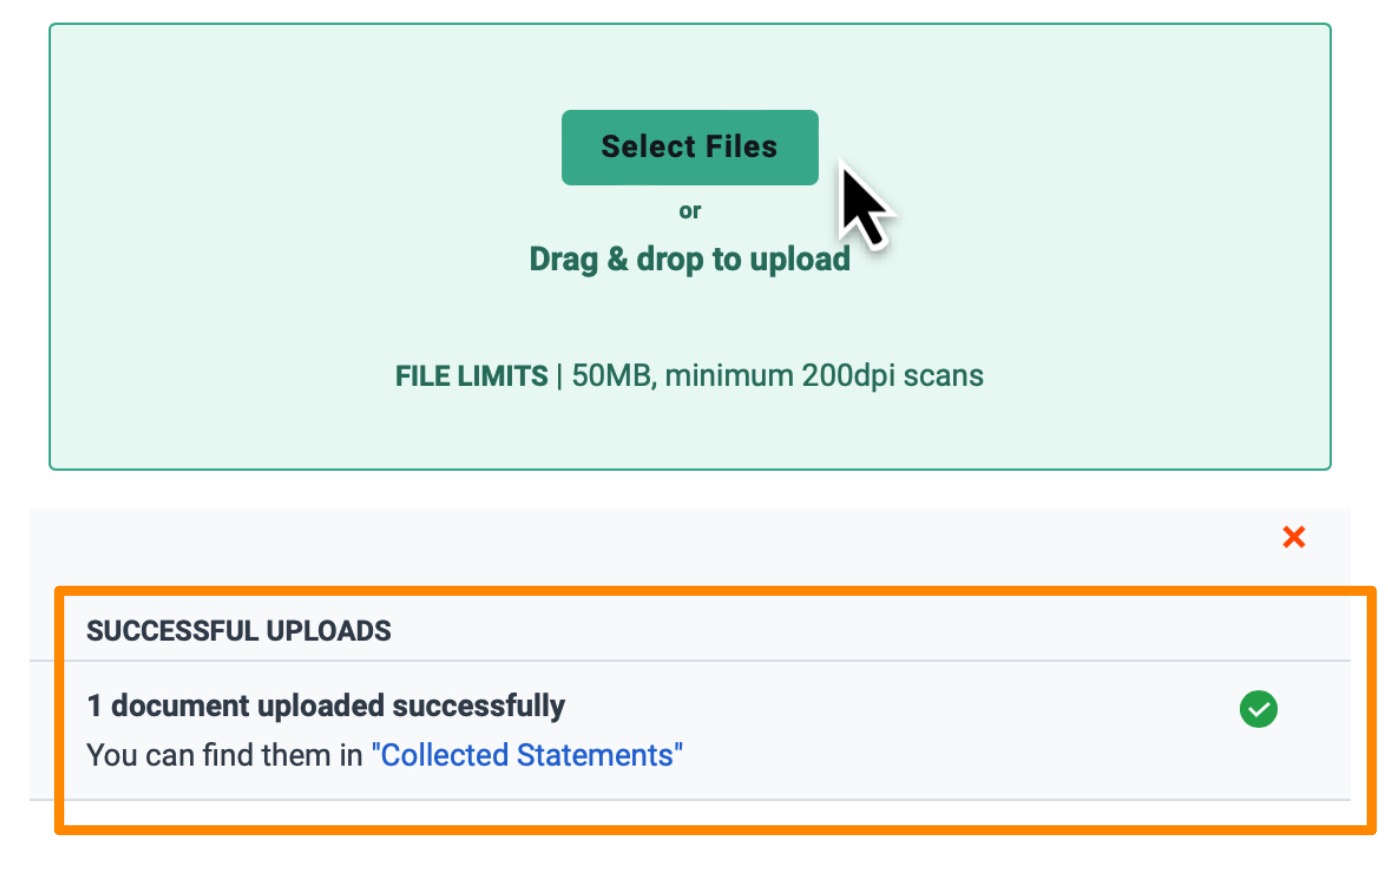
- Add the PDF-file by dragging and dropping it anywhere in the green box. Dext’s messaging system informs you that your upload was successful and that you can view your file in the Collected Statements.
- At the Collected Statements section you can view the file details and you also have the ability to cancel the bank statement extraction.
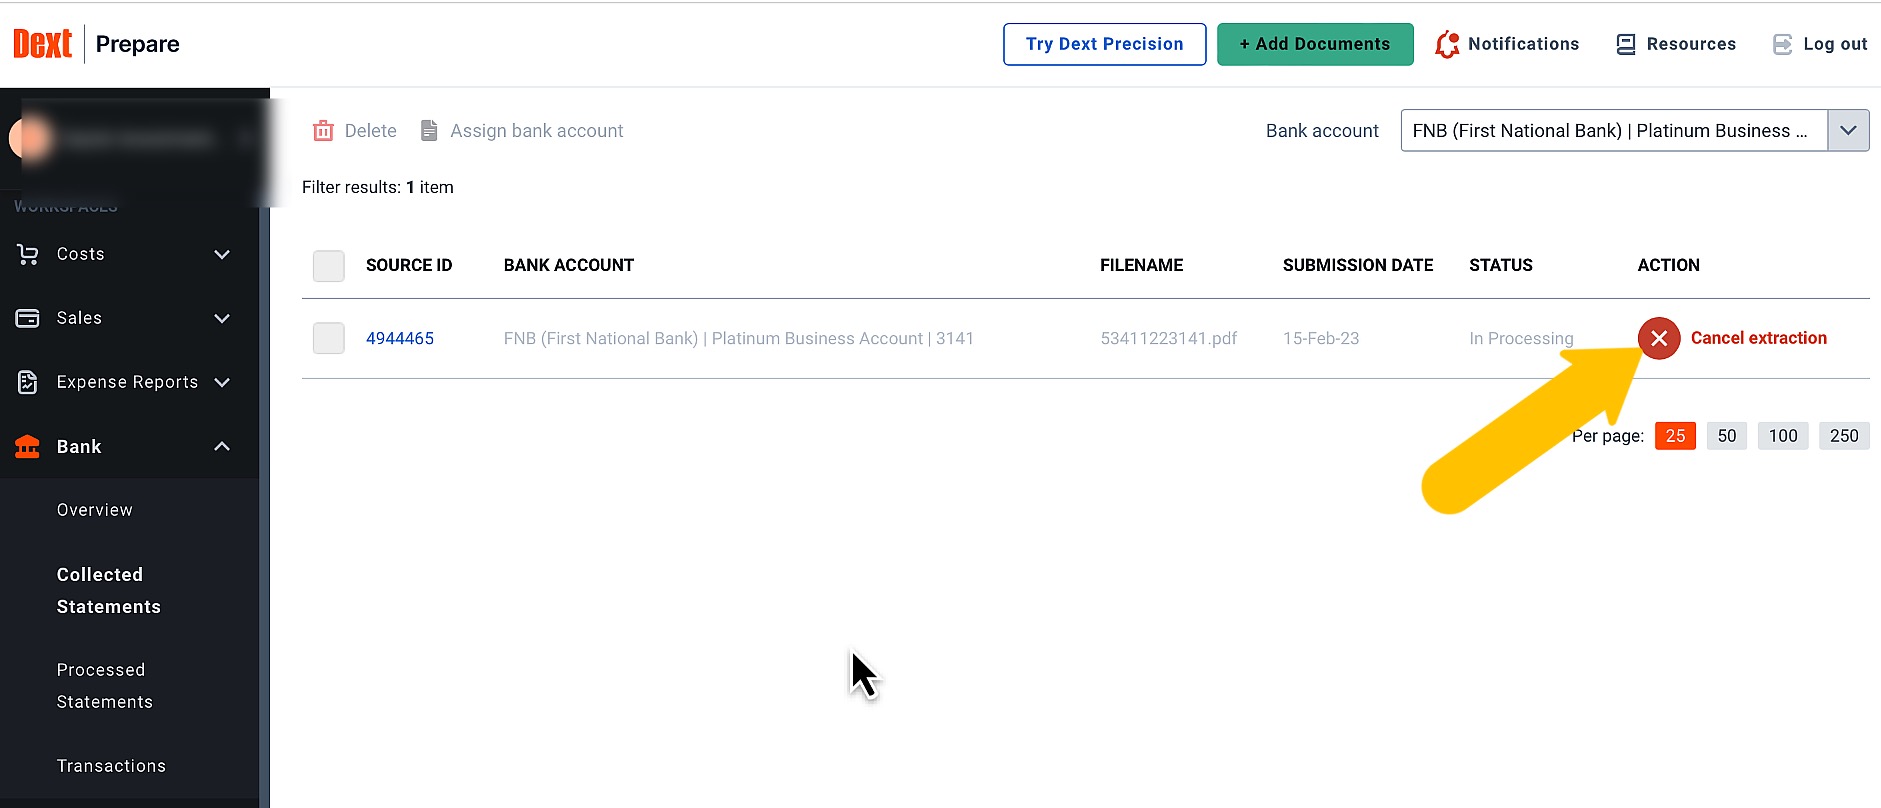
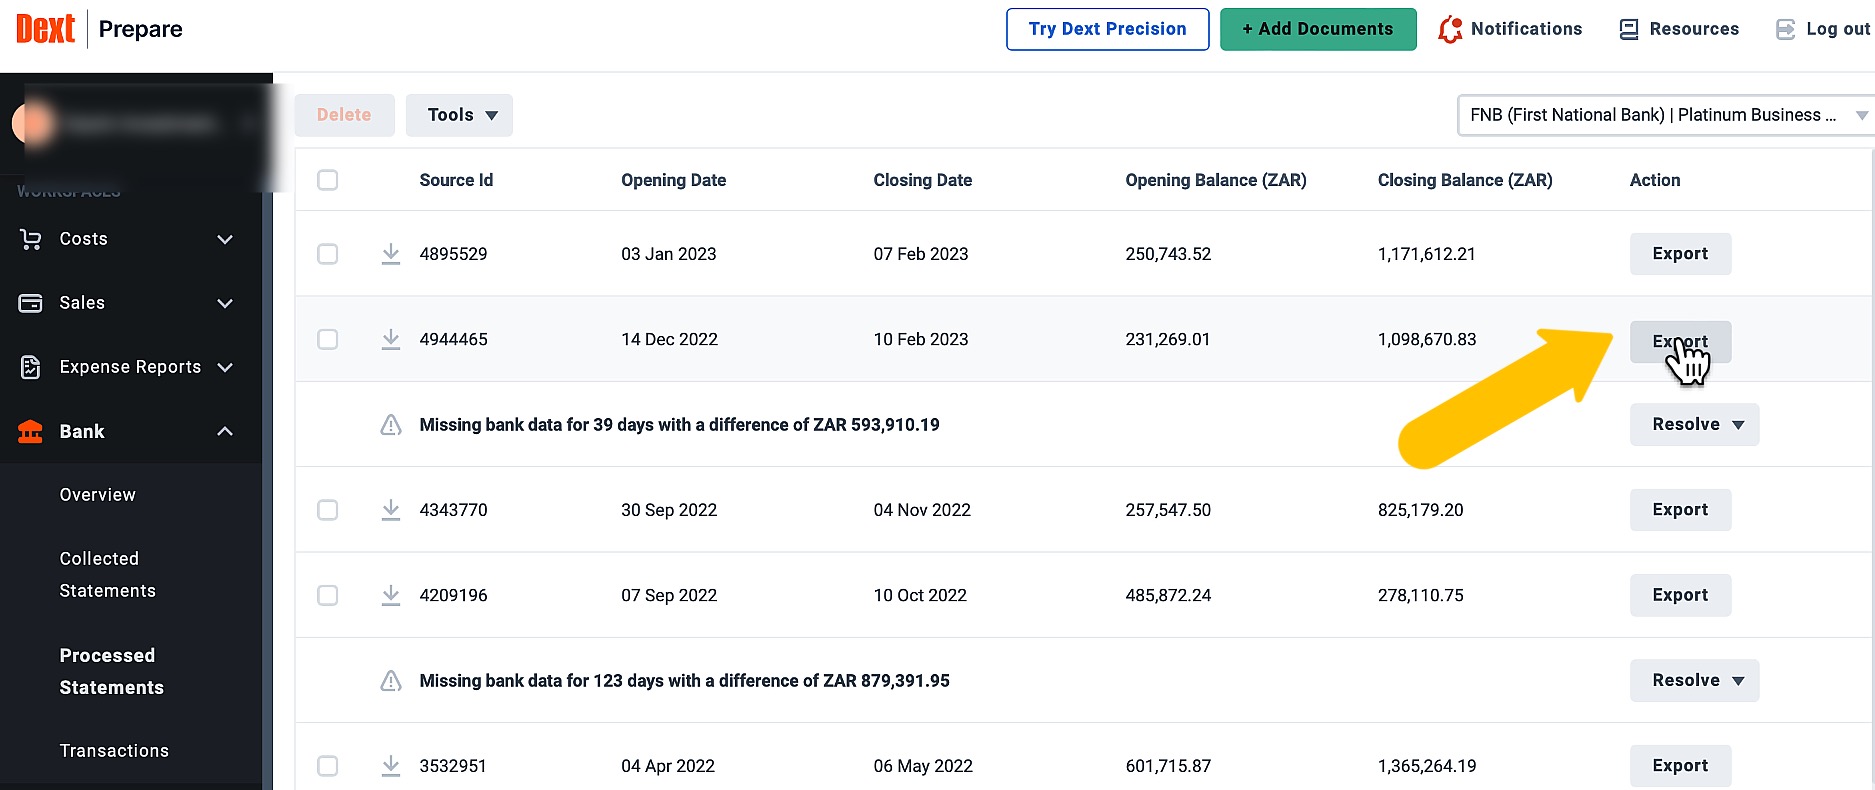
Give the program a little time to do its magic. File extractions can take anything from a few seconds to a couple of hours. - From the Processed Statements you can view all your past and completed bank extractions.
- The next step is to click on “Export” on the line that contains your data. I normally use the date as a guideline to identify which file to export.
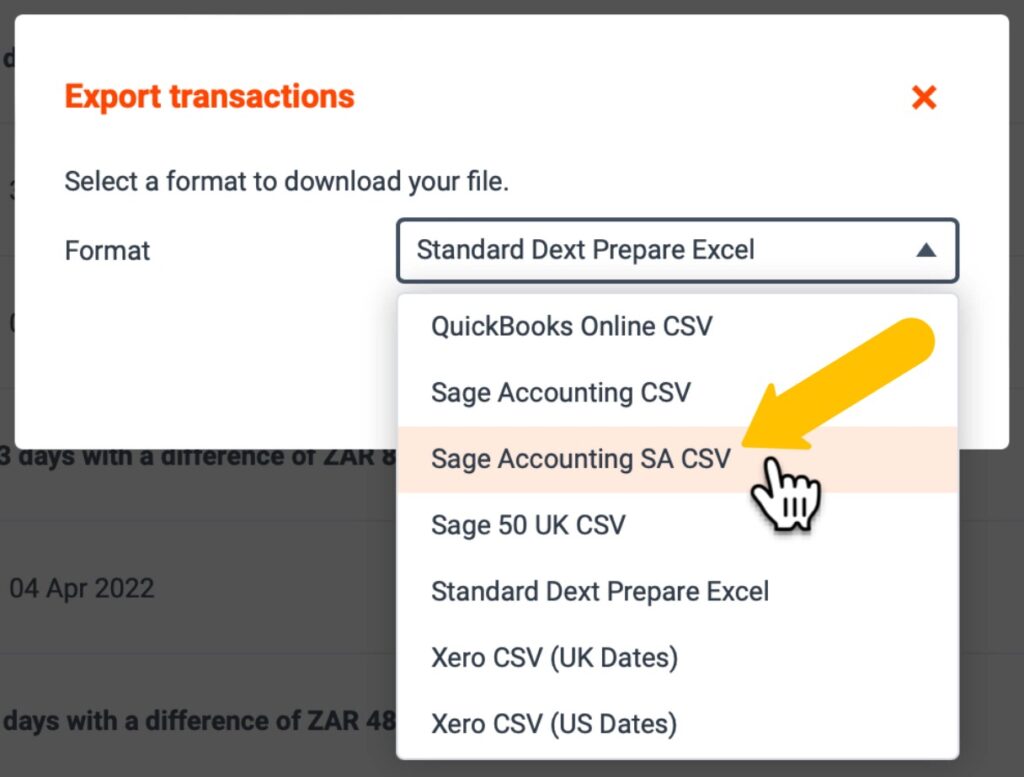
- And here is the new feature of Dext. You can choose which format you want to export your file in, based on the accounting software program that you use. I am based in South Africa and my preferred accounting software is Sage Accounting and not Xero, which I am going to select from the drop-down list and click on “Export”. —>Your file will be saved on your computer‘s local drive.
Reviewing the export file for correctness during my testing process.
Let’s have a look at the contents of the extracted file to see if we are on the right track with the export process.

There are three columns the:
- Date,
- the Description and
- the Amount.
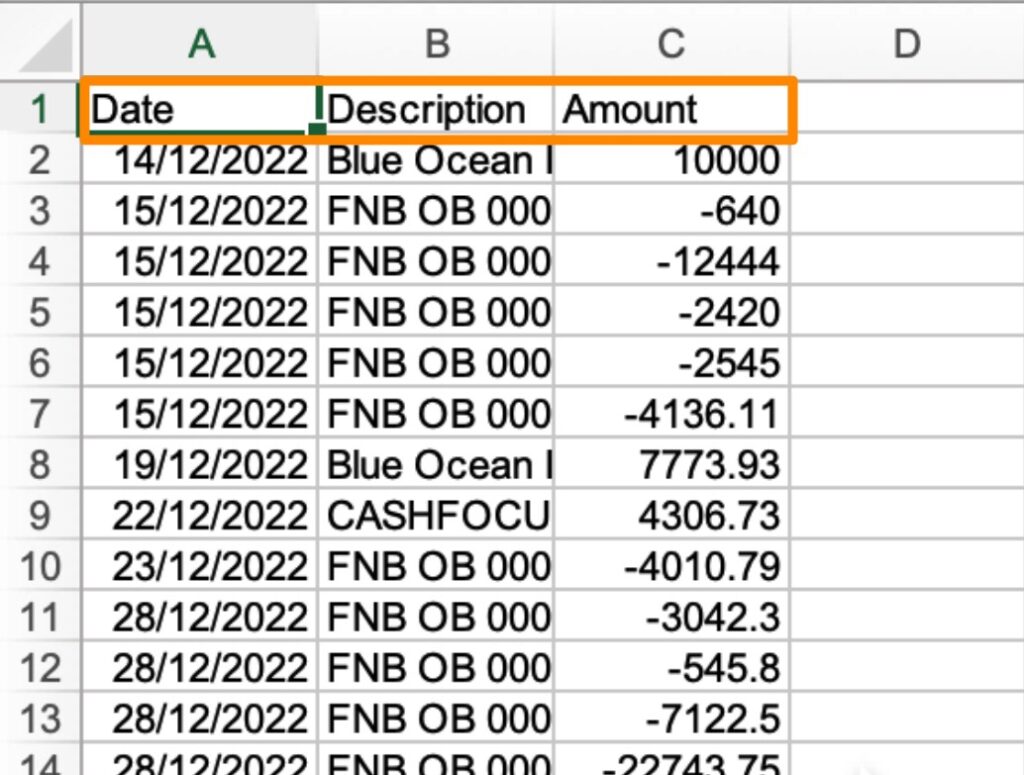
This is the only information needed to import bank transactions into Sage Accounting’s banking function. As I am expanding the column length you can see that the description column is not too long, because Sage has a limit of only 100 characters per column.
Comparing the banks statement to the CSV file for accuracy.
My bank statement started on the 14th of December 2022 with a R10,000 transaction which is exactly what I have in the exported CSV file.
The bank statement also ended on the 10th of February 2023 with the R43,552.63 which is exactly what I have in my exported CSV file.
The fact that the bank statement and the CSV file agrees provides sufficient evidence that the export was completed correctly and accurately.
The final proof for accuracy will be the bank reconciliation process after I have imported this file.
Import the CSV file directly from the export without the need to adjust or tweak anything.
Let’s log into Sage Accounting and test whether we can import the file directly without having to perform any amendments or adjustments.
In the Banking section of Sage Accounting.
Go to the Banking function from the top navigation menu.
Date from when must we import.
Firstly determine when the last transaction was processed in Sage by clicking on the “Reviewed Transactions” button and scrolling to the bottom of the transaction grid. I can see that there are 2 pages. The second page gives me the last transaction processed on the 7th of February 2023. This will be my import starting date.
The actual CSV-file import process.
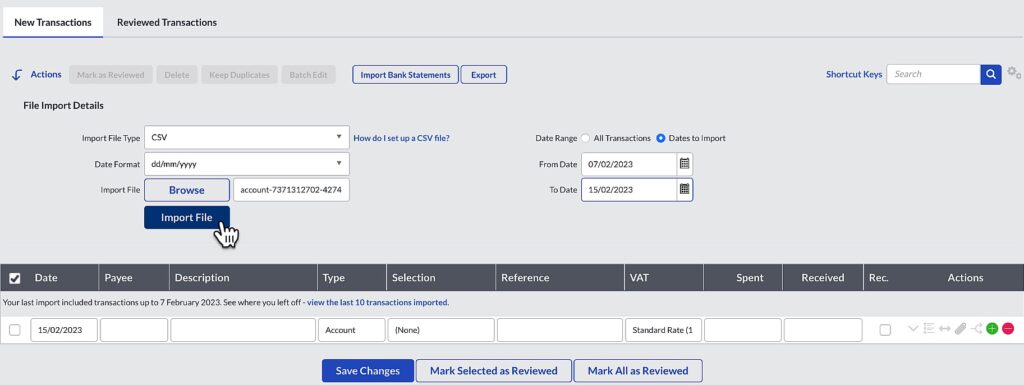
In order to perform the actual CSV-file import:
- You scroll to the top of the page. Select the “New Transactions” button.
- Then click on “Import Bank Statements”.
- Sage asks for the “Import File Type”. Select CSV.
- The “Date Format”-ddmmyyyy is correct, and change it if you need to.
- Browse your PC to find the file you have downloaded from Dext and Upload it.
- A brilliant feature in Sage is that you can specify the exact date range of the bank transactions that you want to import. This is the reason why you first have to check your last bank transaction date in “Reviewed transactions”.
- Select the “To Date” up to the date of your last bank transaction from the bank statement that you want to bring in.
- Once you are happy with the parameters set click on import file and watch the magic happen.
Usually the CSV-file import goes without any hick-ups.
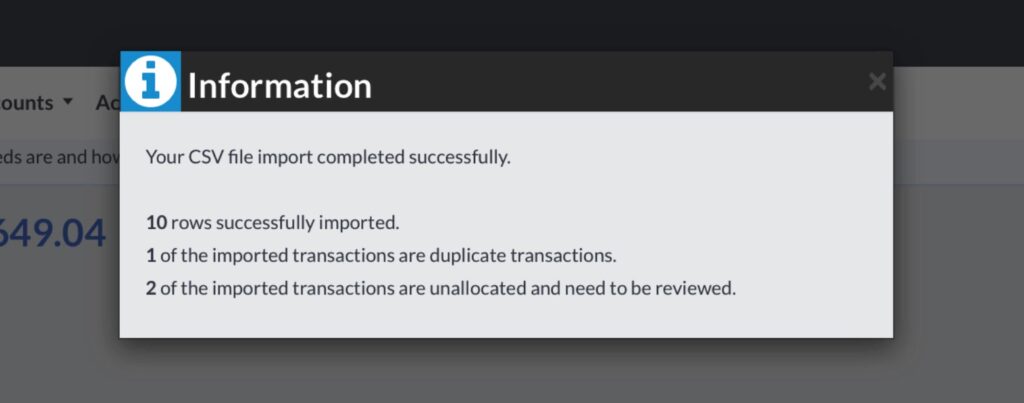
Possible duplicates are identified.

When I selected the “From Date”, there was a possibility that some transactions were already processed in Sage, because I did not pin-point exactly the last transaction done. I did this on purpose because Sage is really good at identifying duplicate transactions from where you can easily remove them.
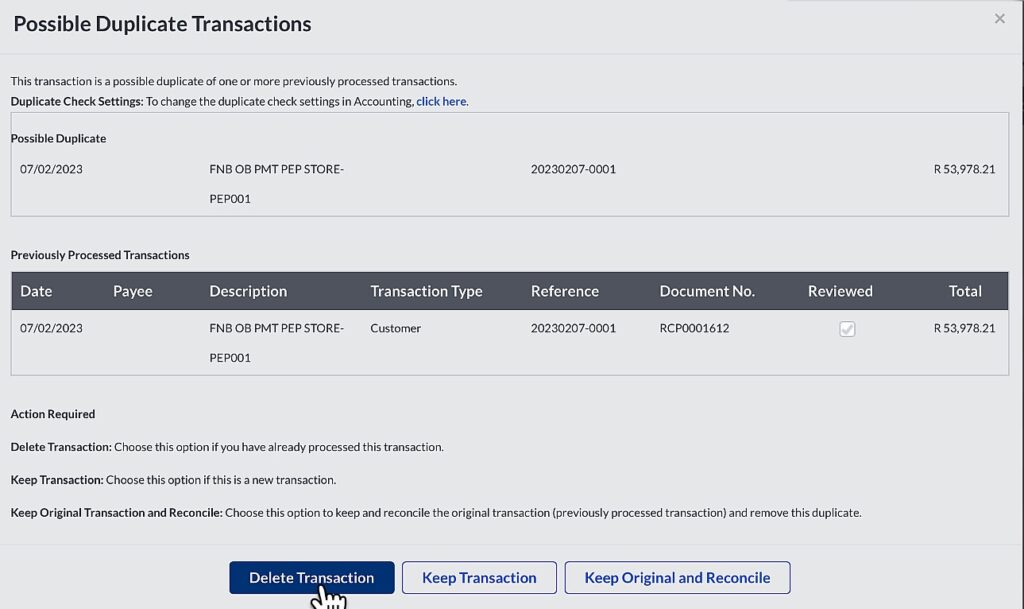
Removing duplicates goes quick.
You remove a duplicate transaction by:
- Clicking on Duplicates found and then
- Delete Transaction.
The Dext bank export is a winner!
Well, I think Dext released a winner here!
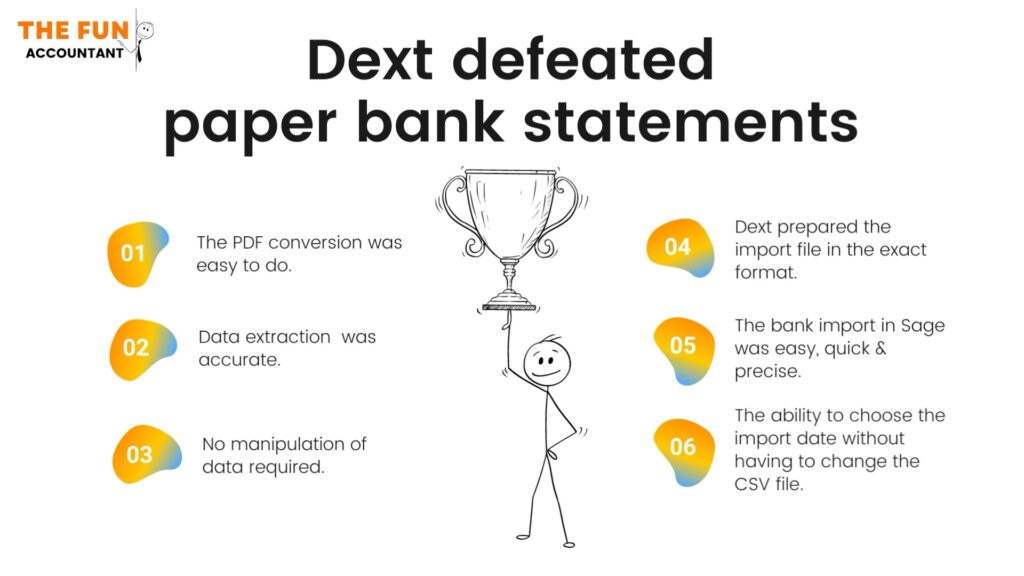
The reasons why I think so are:
- the PDF bank file conversion in Dext is easy to do.
- The data extraction was accurate.
- No data manipulation was required because Dext prepared the Export file in exactly the correct format to be easily imported into Sage Accounting.
- The bank data import in Sage was also quick and easy to do and the data imported was accurate.
- As a bonus I could choose the import dates during the last step of the import process which was seamless.
All and all I am impressed with this feature of Dext.

