
In this blog I show you how the Dext mobile in conjunction with Sage Business Cloud Accounting can speed up your bookkeeping tasks, reduce unnecessary paperwork and store cost vouchers without having physical files, for easy electronic retrieval at a later stage.
You can reduce your manual data capturing and speed up your bookkeeping process with the Dext mobile app and Sage Business Cloud Accounting. To illustrate this concept I capture a business expense with the Dext mobile app. Then I test the validity of the automatic data extraction and follow the transaction through to Sage. In Sage I do a transaction walk-through-test in order to determine if the transaction was processed correctly and accurately. Our end goal is to perform crucial business tasks with little or no human involvement and thus speeding up the bookkeeping process.
I will be using the android version of Dext in the demonstration of the Dext mobile app.
Our starting point
The Dext mobile app is the starting point of recording our expense transaction. In front of me I have an expense slip received from a restaurant that I have visited to entertain clients.

I have already downloaded the Dext mobile app and I press the Dext icon on my phone. Dext will open. At the bottom of my screen I press on the camera icon. Dext access my phone’s camera and I can now snap a picture of the expense slip. The system setting is single which means that I am going to take a picture of a single slip at a time. To enable you to view your slips at a later time ensure that the photo of the slip is clear and readable before you press the green folder button on your phone.
Complete expense category and description information fields
Once I have taken the photo, Dext give me the option to immediately complete other fields like the expense category and description. To ensure that I don’t forget who I entertained, I complete the description field. It is a requirement of the South African Revenue Service to provide an explanation about entertainment expenses. By completing the description and name I would be able to comply with their requirements.
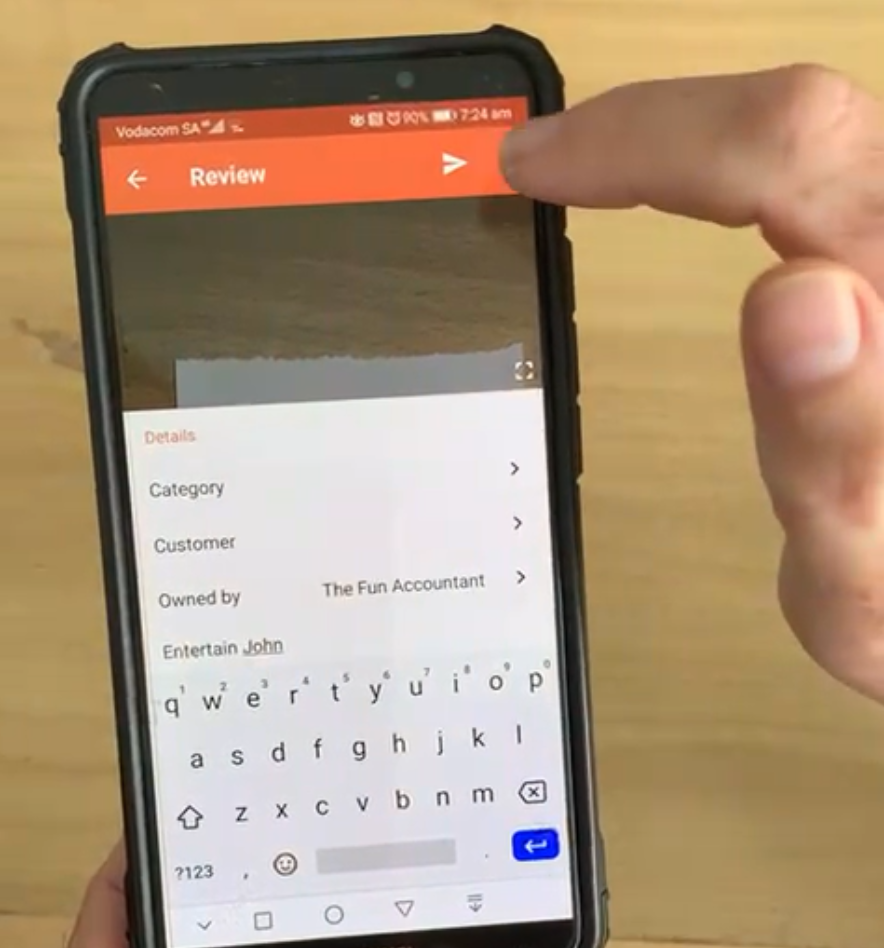
At the top right corner in the review field I press on the forward icon. The slip is now loaded onto Dext where the magic extraction can happen.
My advice or best practice after I have uploaded a slip is to rather log in to Dext from a PC. In the web app the screen is much larger and it is easier to view and read the finer details on the expense slip.
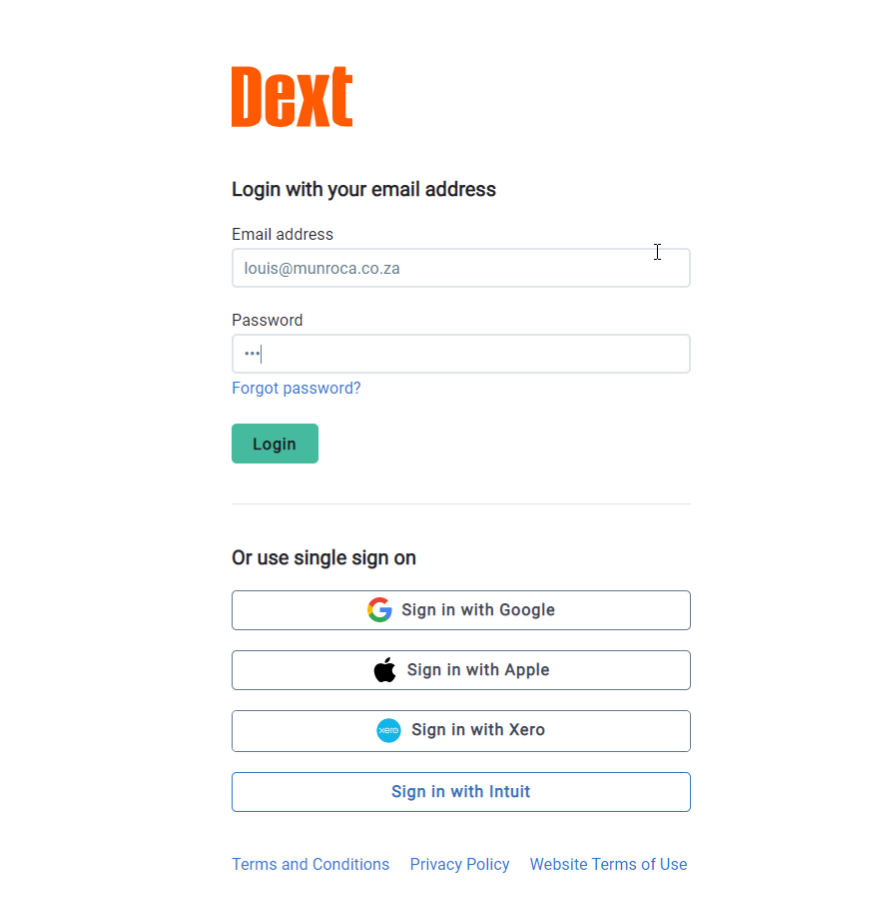
I am now going to login to Dext with my laptop where I can also view the slips that I have captured with my mobile phone.
Login to Dext web app
The Dext inbox contains loaded slips
All the costs slips and invoices can be found at the inbox within the Costs menu. The expense slip that I have just uploaded with the Dext mobile app appears in the inbox with its status marked in an orange button “To Review”.
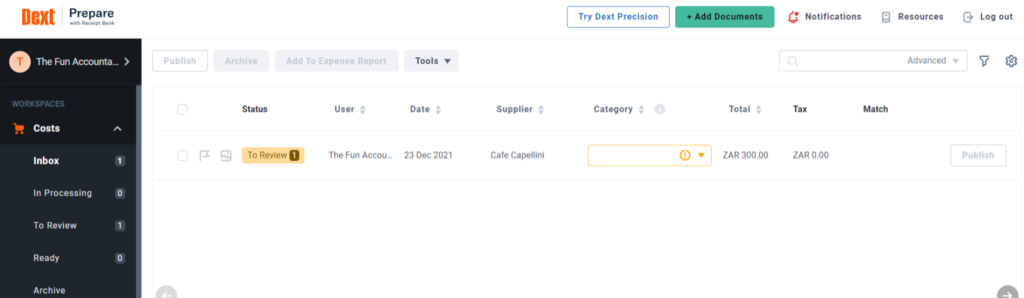
Click on the “To Review” button.
The Dext extraction fields
The photo of the slip is on the left side and the fields extracted from the photo are on the right hand side of the screen.
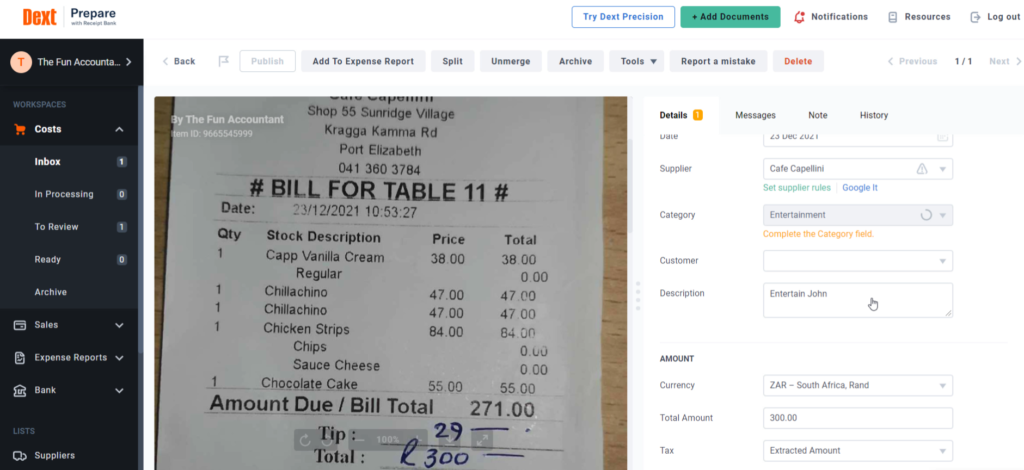
To verify that Dext has extracted the correct information from the slip we can look at each field:
- The type of document is a receipt.
- We can see that the date on the slip agrees with the date extracted by Dext.
- The supplier’s name agrees with the slip.
- Now we can categorize this expense by clicking on category. Our list of expense categories which is obtained from our accounting software is displayed. Dext’s predictive text is great. By starting to type the name “e.n.t.e.r.” We can narrow down the selection to entertainment.
- You can see the description that I have typed on the mobile app appears in your description field and I can add additional information or replace it with something else if I want to.
- Under the Amount heading we can see that the written total amount agrees with the amount extracted by Dext.
- The tax field default setting is set as Extracted Amount which means that the tax stated on the invoice will be used. Naturally with suppliers that are not VAT registered the default should be NIL.
You can also zoom in and out to have a clearer view of the slip.
Since No VAT or tax is claimable on this entertainment expense I am going to ensure that no VAT is allocated on this transaction by going down the drop-down list of the Tax amount typing in “n-o” For “no” to refine my search and then select No VAT for this transaction.
Processing as a bank transaction
For the purpose of this example I am going to process this transaction as a bank transaction entry to one of our bank accounts. An alternative would be to process it as a supplier transaction as a supplier invoice.
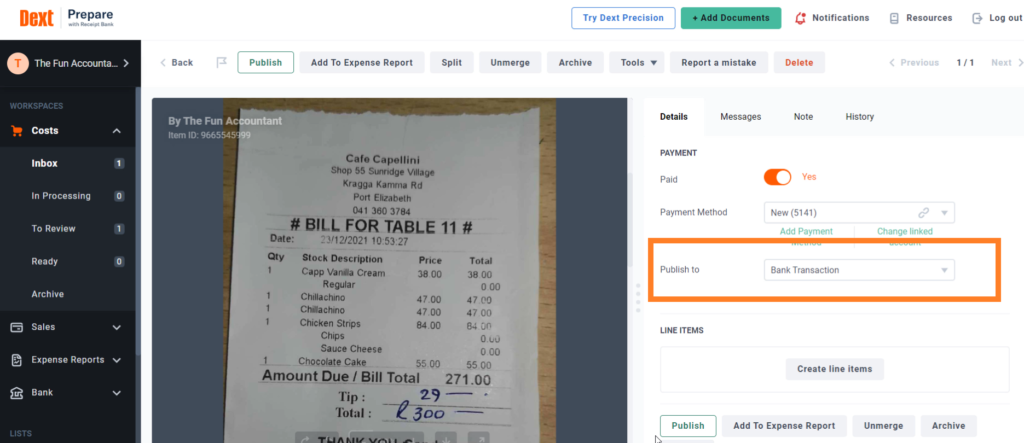
We select the payment method. Each payment method is linked to a cash book in our Sage Cloud accounting system. If a payment method is not yet linked to our accounting bank or cashbook, we can link it here by selecting the bank and then click on “link“.
Publish to Sage
When the publish button is green it means that all the parameters that are required by Dext to post this transaction to Sage have been completed.
Click on publish and the transaction is now recorded in our accounting system.
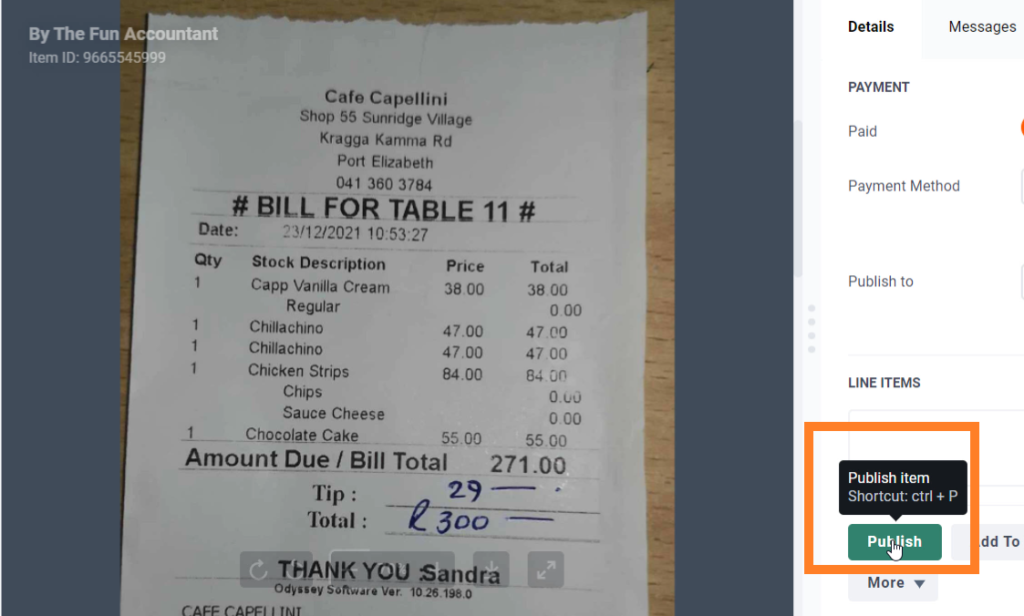
Once the publishing is completed you will get the message at the bottom of your screen saying Item successfully published to Sage Accounting South Africa with my company’s name – The Fun Accountant Demo.
After an item has been published it is removed from the inbox and transferred to the Archive folder. The Archive folder is the place where your slips are stored after you have published it.
Walk-through-test in Sage Cloud Accounting
In order to test how this transaction was captured in Sage Cloud Accounting we are going to perform a walk-through-test. In a walk-through-test we’re merely tracing the transaction in our accounting records to the ledgers where it has been posted. We can then determine the accuracy and correctness of the transaction in our accounting records. In our case we will trace this transaction to our “cashbook” (bank transactions) and then to the “entertainment” expense account which is the category we selected for this expense.
Bank transaction
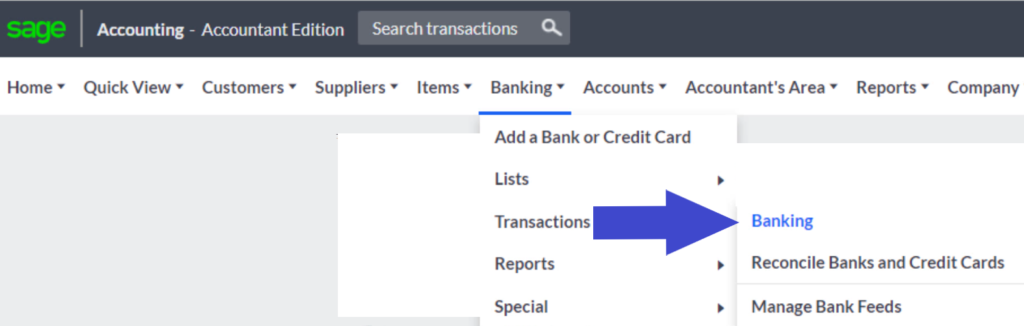
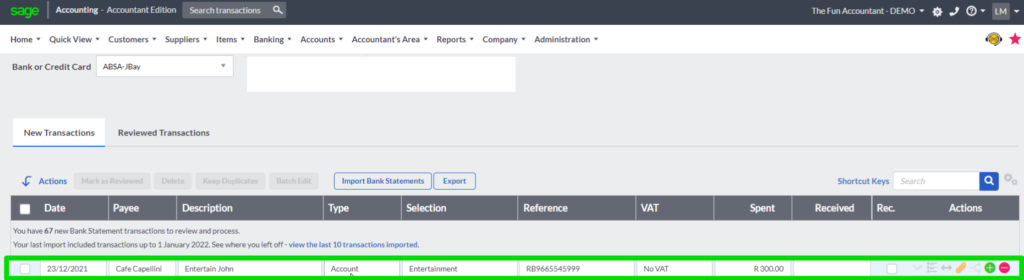
At the top navigation bar, we go to ==>banking, ==>transactions, then click on banking. You will be directed to “New Transactions” in your bank account. All your new bank transactions are displayed here.
At the top line we can see that the entry has been processed in our bank account with the
- Date,
- Supplier name under the Payee column,
- the description that I entered on the Dext mobile app,
- the type is account,
- and the account category selected by the system is entertainment.
- Dext has also added a reference number,
- No VAT has been recorded and
- the total amount of R300 has been added to the spent column.
The transaction line attachment feature
A helpful feature is the proof of the expense that has been added to the transaction line. With this feature there is no need to look in physical files in an attempt to find a document that relates to a transaction. You can see that the paperclip near the end of the transaction line now has an orange color instead of the normal gray color which means that there is a document attached to this line in my bank account.
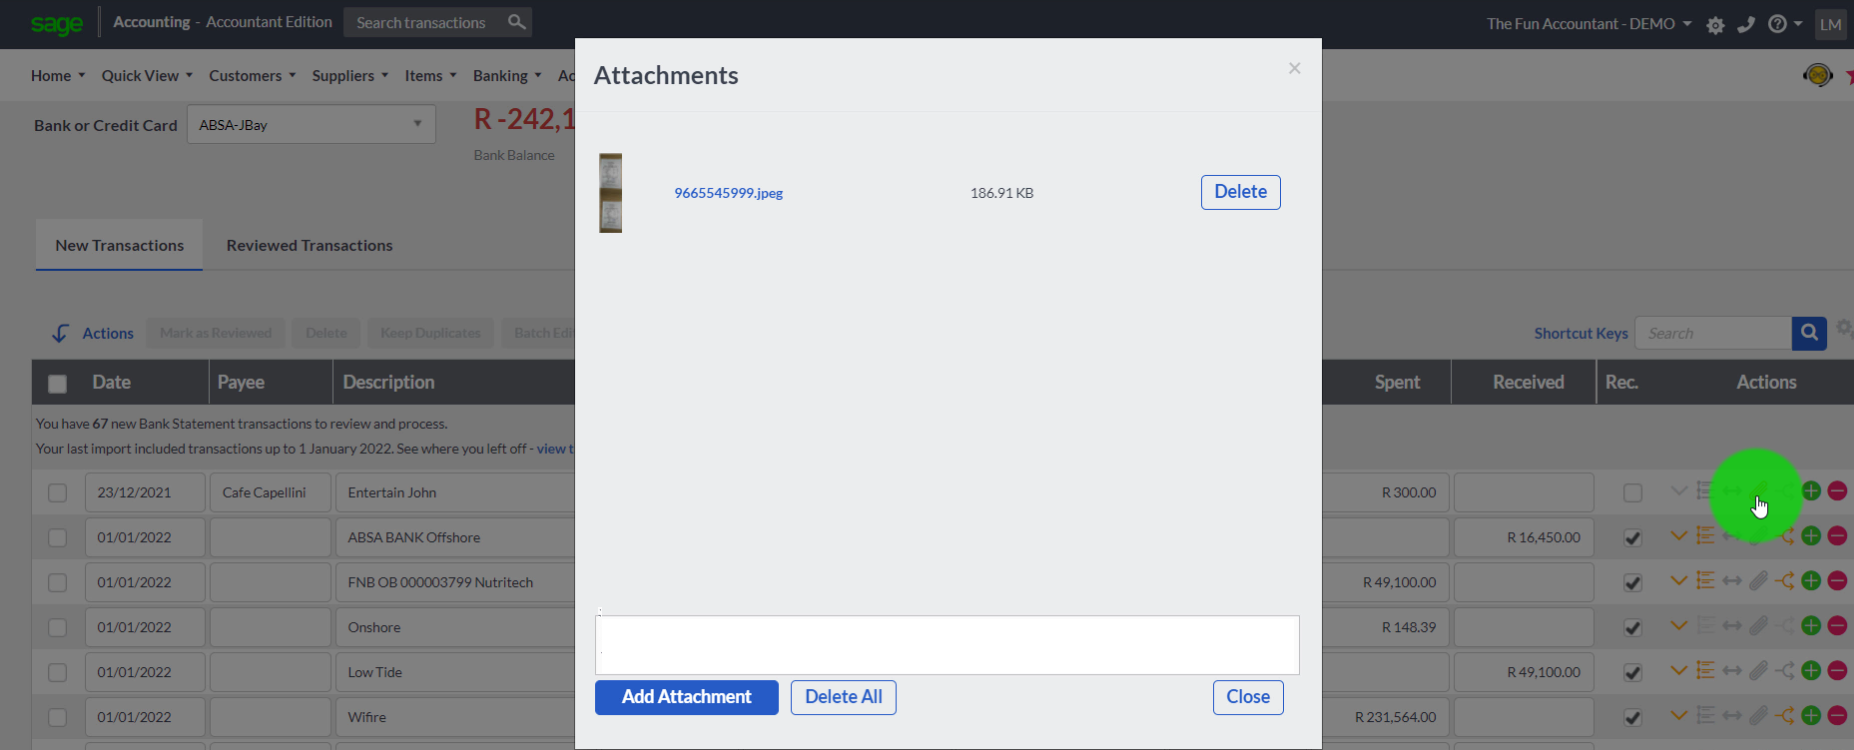
To open the document we: click on the orange paperclip and the attachment menu will open. In most cases this attachment is too small to view it properly. If you click on the file number next to the picture you can download the document from where you can open it and the image of the slip that I have taken is displayed. To go back to your bank transactions you click on close.
Testing the expense processing from Dext to Sage
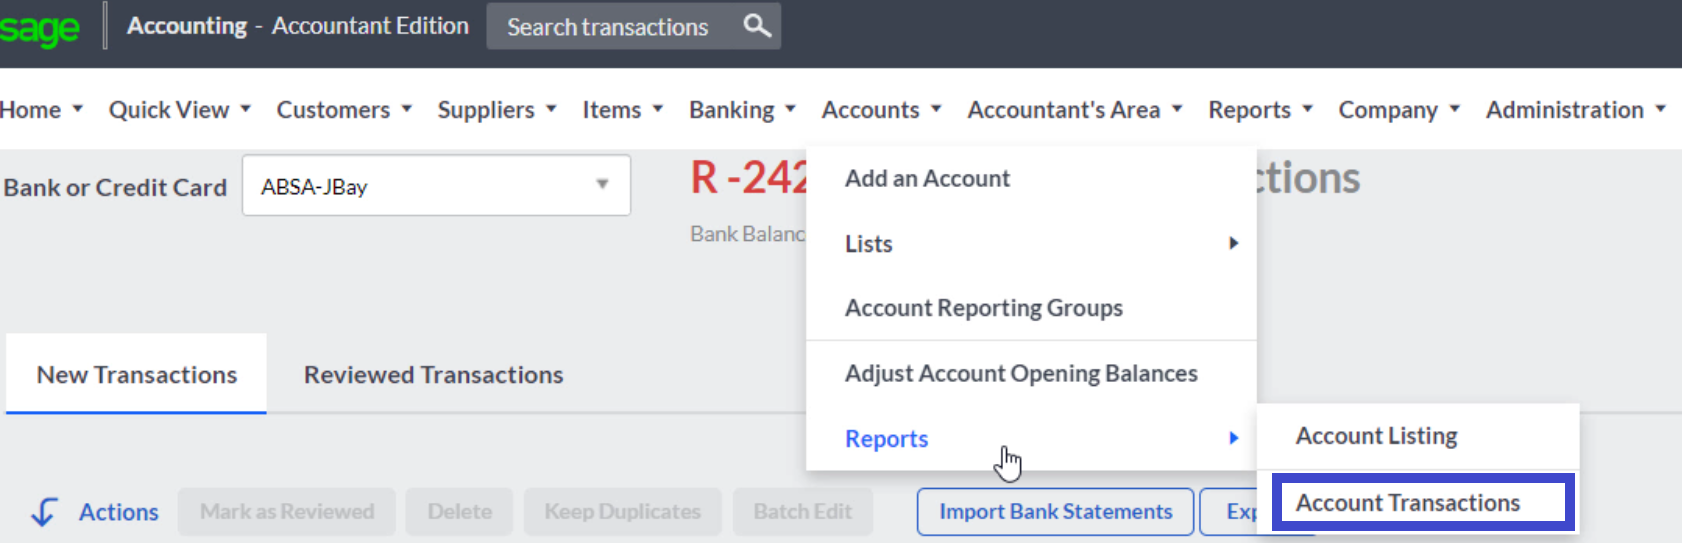
To view the classification of the expense in its category you go to Accounts at the top navigation menu, then reports and then click on Account Transactions.
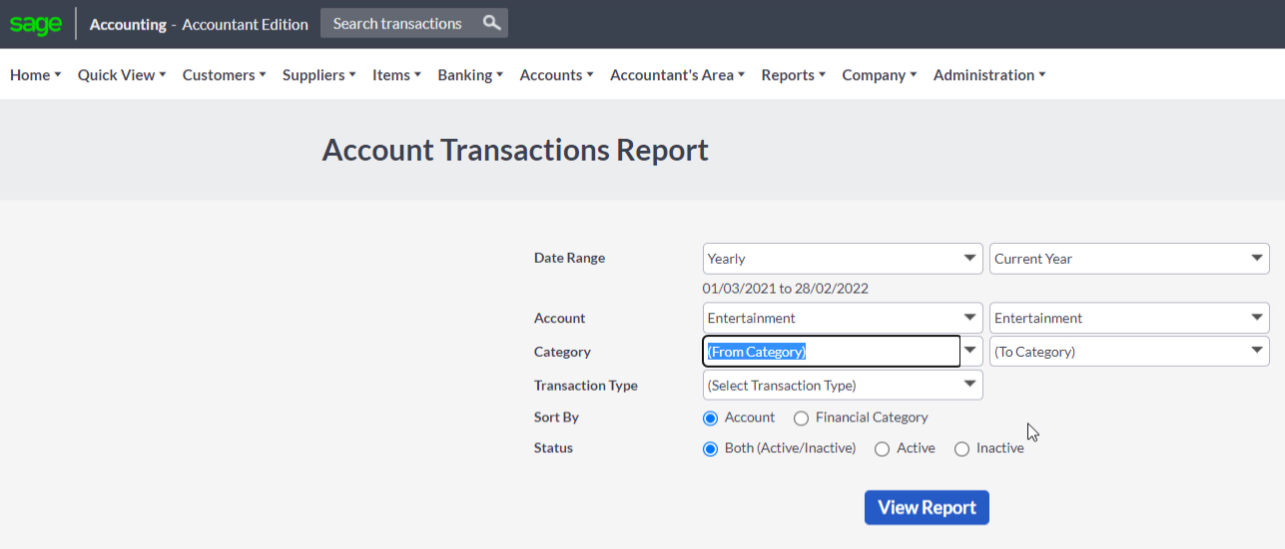
You are directed to the Transaction Reports menu where you can determine the date range of your report, the Account you would like to view and other settings that will determine the report you would like to get from the system.
In the date range we are going to select ==> yearly, ==>current year and then by clicking in the field next to Account, all the accounts will open from where we can make a selection. We start to type entertainment and the options that I can choose from are narrowed down depending on what I have typed. We select Entertainment and then click on ==>View Report button.
In the entertainment transaction report we can see the transaction in the last line of our ledger.
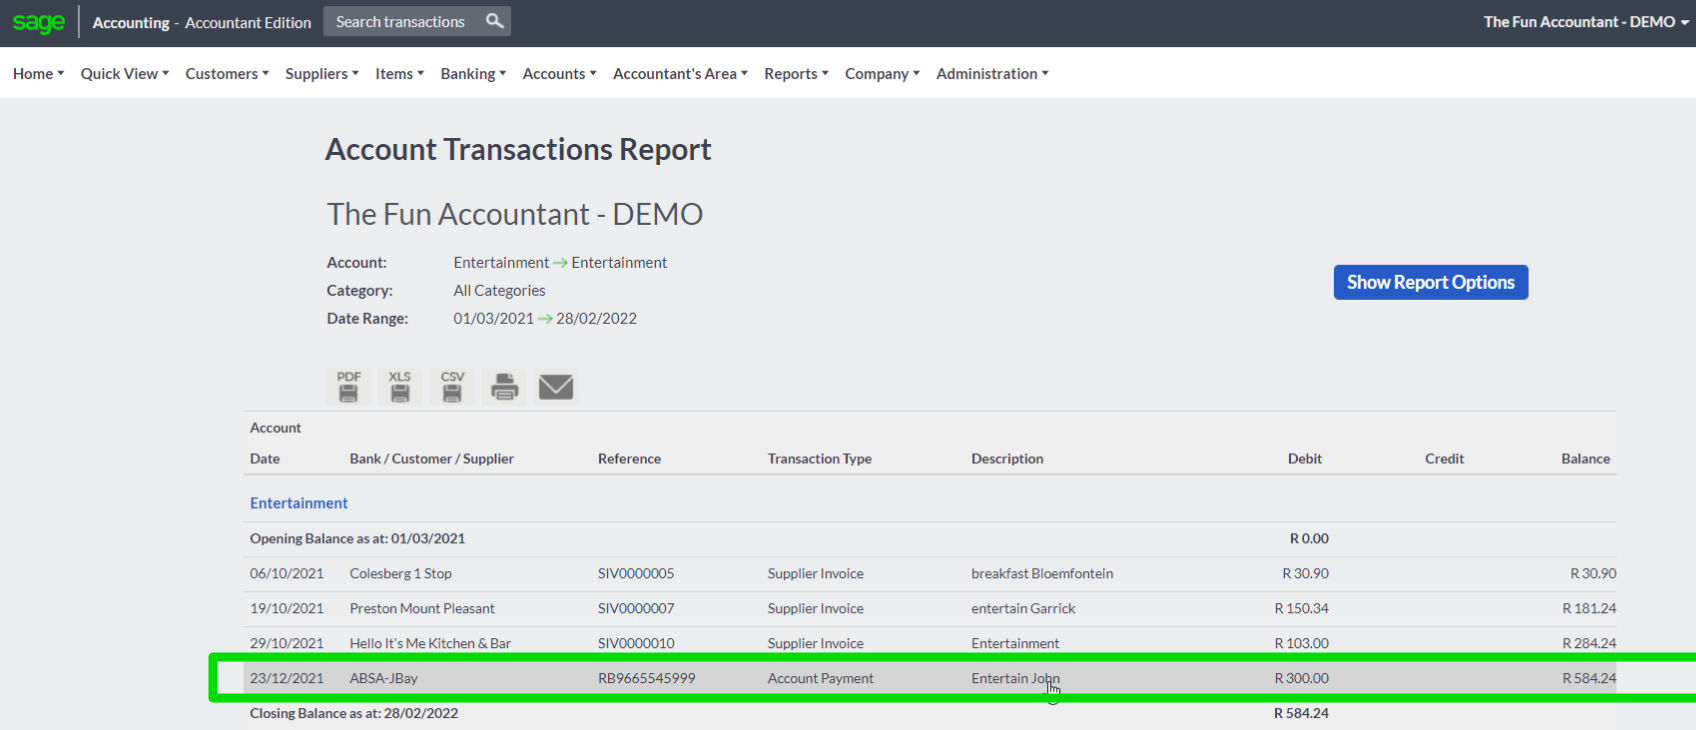
Success!
We have now completed our testing. I hope that you have noticed that I did not manually capture any data except for the description while I was on the Dext mobile app. Hopefully you too can fast track your bookkeeping tasks with the cloud accounting tools that I have shown in this article.