
Dext & Sage form a powerful combination for small business owners who want to be paperless, efficient businesses. The power of the two systems lays in the integration of Dext and Sage that gives us the ability to automatically process transactions to our accounting system, after we have uploaded our vouchers or invoices via the Dext mobile app or via the e-mail sending function.
In this article we take the first step after activating our Dext account and that is to link Dext to Sage Business Cloud Accounting. Then we test the integration between the two software programs with a real document to see if it works!
Video Link
Click on the YouTube video link below to get this explanation in video format.
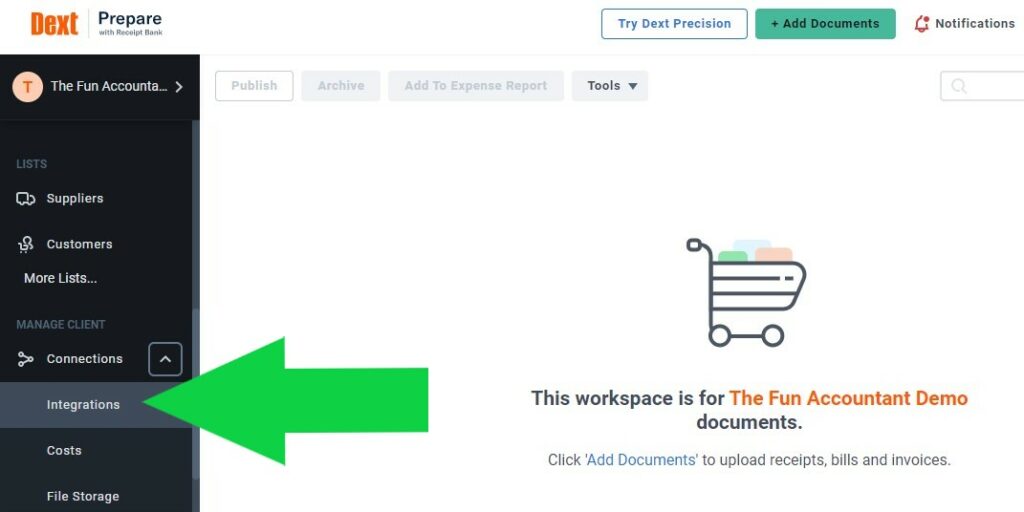
Step 1: Integrations at left side navigation bar
We have logged into our company’s Dext account.
You scroll down the left hand side menu bar you will see “Connections” and right underneath it. Your first item is “Integrations”. Click on it
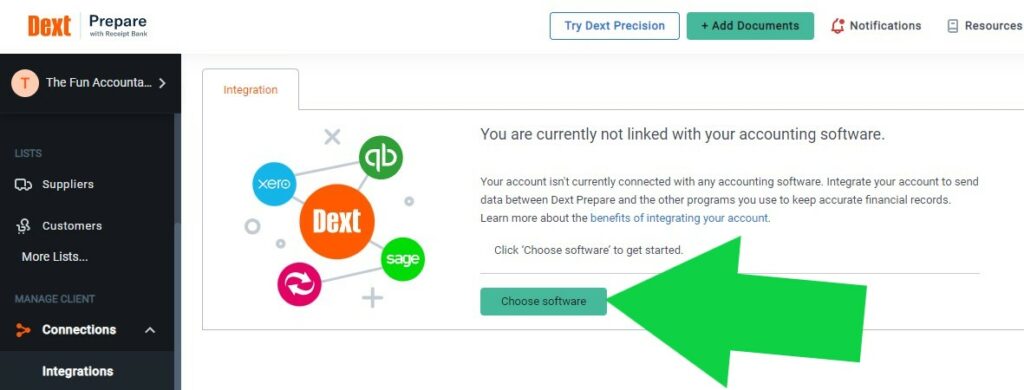
Step 2: Choose software
On the next screen you will get the message “You are not currently linked with your accounting software”. This is precisely what we want to change.
To get started click on the green button “Choose Software”
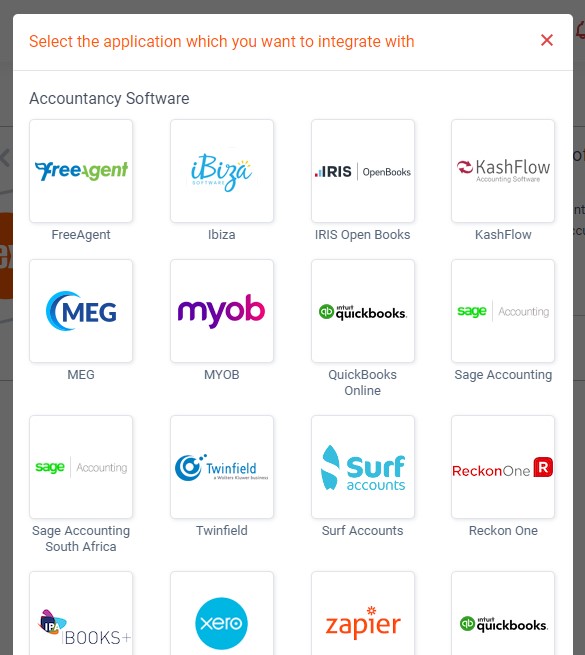
Step 3: Select your accounting package
You are presented with a number of accounting software packages that can integrate with Dext. Select your accounting package by clicking on it.
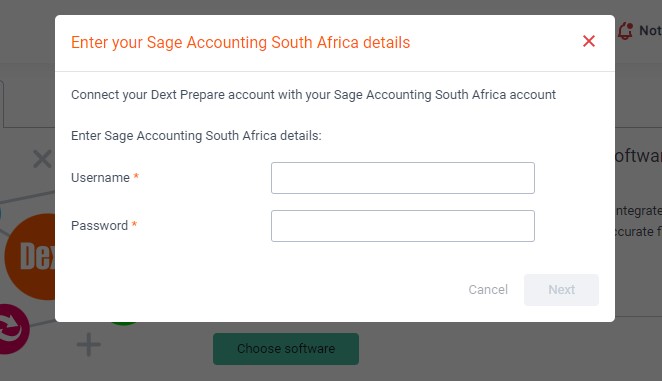
Step 4: Enter your login details
In this step you must have your accounting login details on hand because this is where you enter your username and password and then click on next.
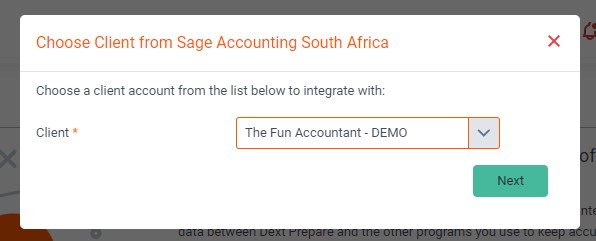
Step 5: Choose your entity
In this step you choose your entity that you would like to integrate. If you have more than one entity registered on your accounting software you will be presented with a list of entities. Select the one that you would like to link with Dext and click on next.
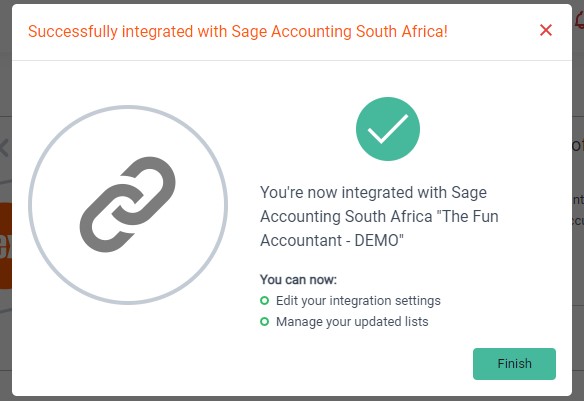
Step 6: Success!
If everything went according to plan and your link is successful you will get a message that Dext is now integrated with Sage Accounting. Click on “finish”.
Step 7 But wait! There is more.
Your Dext is now integrated but there is more!
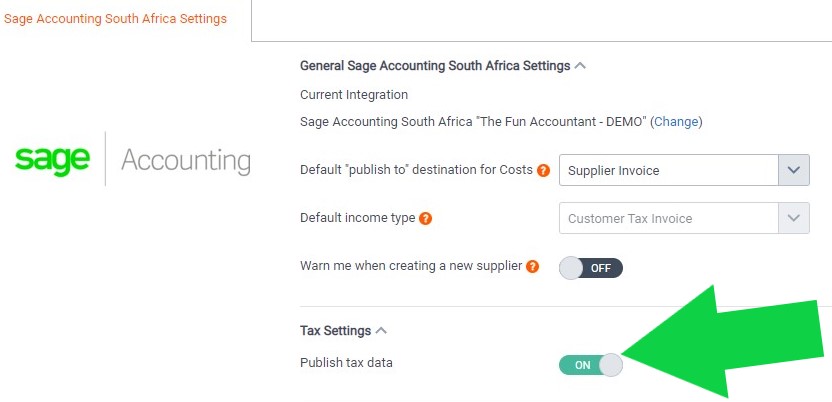
You have more options to choose certain preferences. In this article we are only going to focus on one and that is to ensure that your tax publishing is either set on “on” or “off” depending on whether you are registered for VAT or not.
You certainly do not want to have this setting on “on” if you are not registered because Dext is going to post tax transactions in your accounting system which is something that you don’t want.
Test 1,2,3…
Let’s test our integration with a real supplier document to ensure that our data gets transferred correctly from Dext’s field extraction to our accounting transactions fields.
In this example I am going to use a picture of a random voucher taken by the Dext App. We are gong to follow a few simple steps in this test.
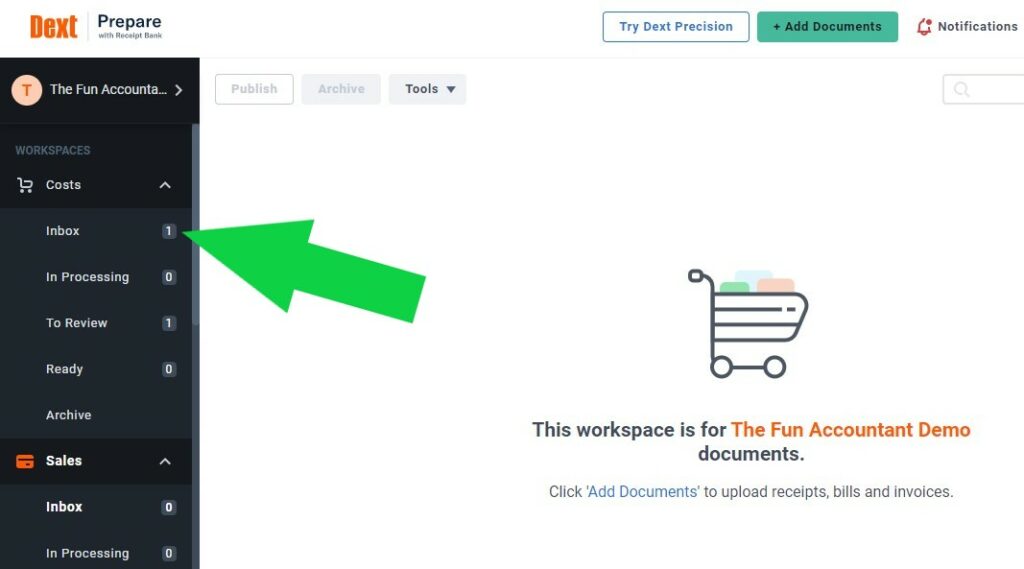
Testing Step 1: Navigate to “costs”
In the left side navigation menu scroll right to the top of the menu bar under the grey menu “workspaces” you find the “Costs” submenu. If you click on the dropdown list more options will open. In the “Inbox” you will find all the slips and invoices captured on the Dext system. These documents are waiting to be reviewed and categorised for integration into your accounting software
Testing Step 2: To Review
Click on the orange colored button “to review”.
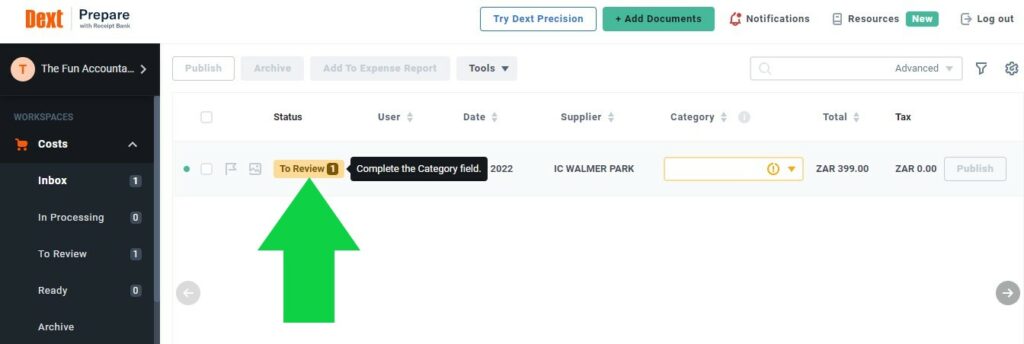
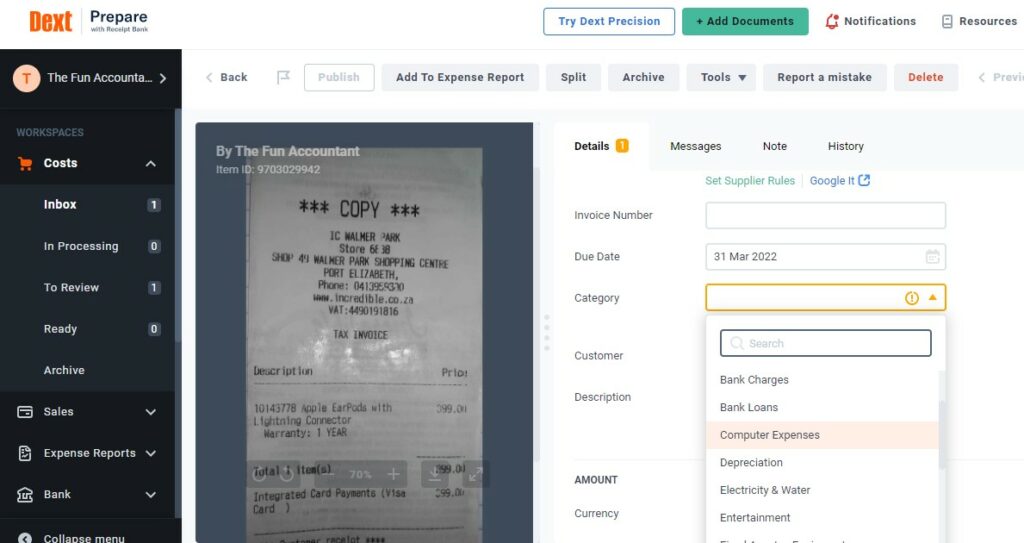
Testing Step 3: Categorize
Dext opens a viewing pane on the left showing our slip and the details of all the fields that have been extracted by the Dext system. From my experience of having processed thousands of these documents this automatic extraction by the Dext system is extremely accurate.
We select the appropriate class of expense to categorize it for posting it to our accounting software.
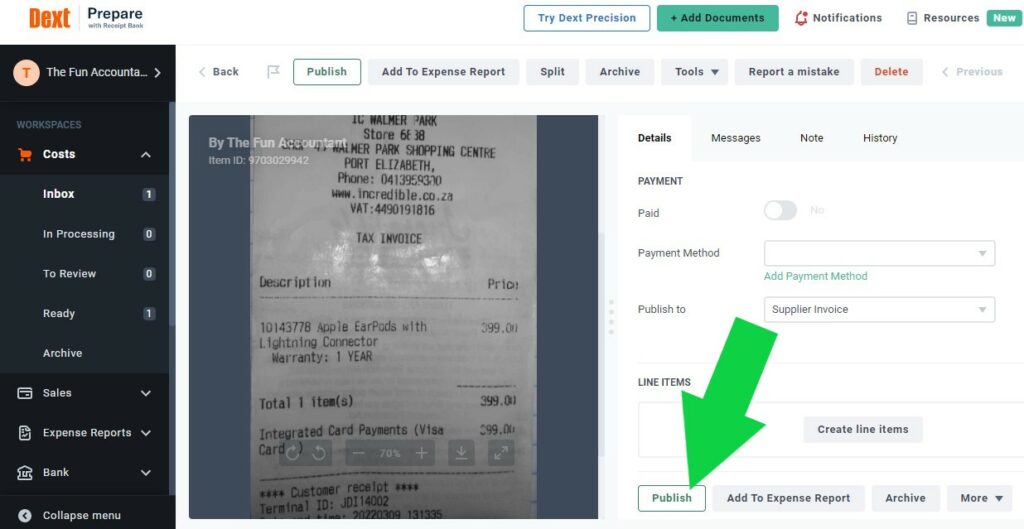
Testing Step 4: Publish
You are happy with all the details extracted in the fields by Dext and are also happy with the allocation of this expense to then click on “Publish”.
Testing Step 5: Log into your accounting package and select “Supplier Invoices”
Now you log into your accounting software. I have used Sage Business Cloud Accounting for this demo purposes and I am going to verify that this transaction was successfully posted to Sage and that the integration between Dext and Sage was indeed successful.
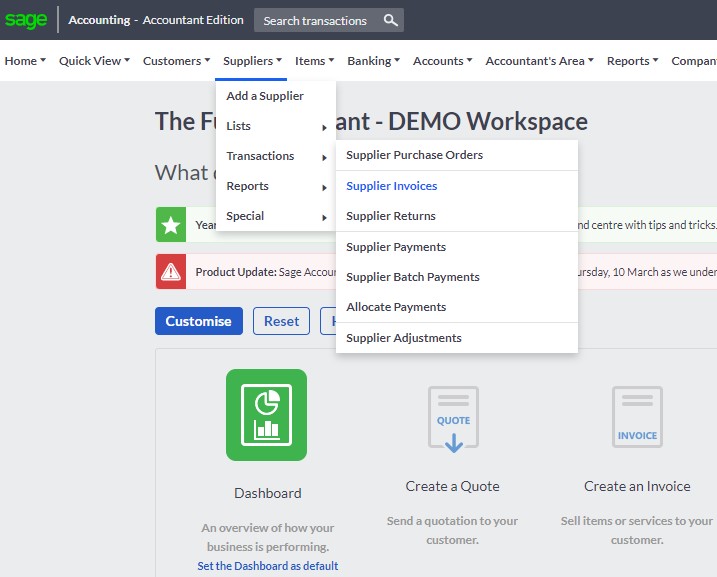
This transaction was published as a supplier invoice. In Sage’s the top navigation menu bar, I:
– hover over Suppliers;
– move my cursor down to transactions;
– move my cursor to the right and
– click “Supplier Invoices”
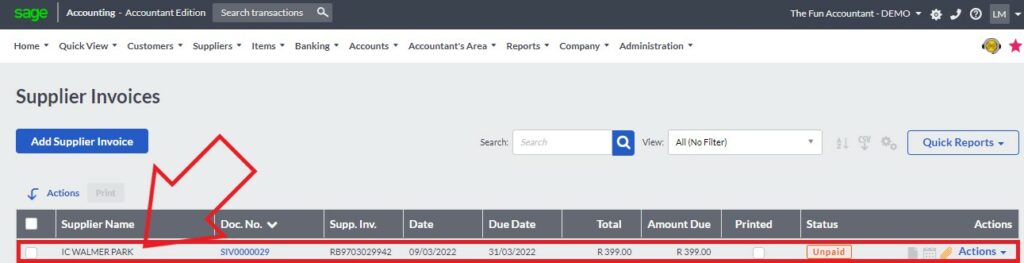
List of “Supplier Invoices” in Sage
In this screen a list of supplier invoices processed in Sage appear. Right at the top I can see from the supplier name that the invoice I have published in Dext has now been processed as a supplier invoice transaction in Sage.
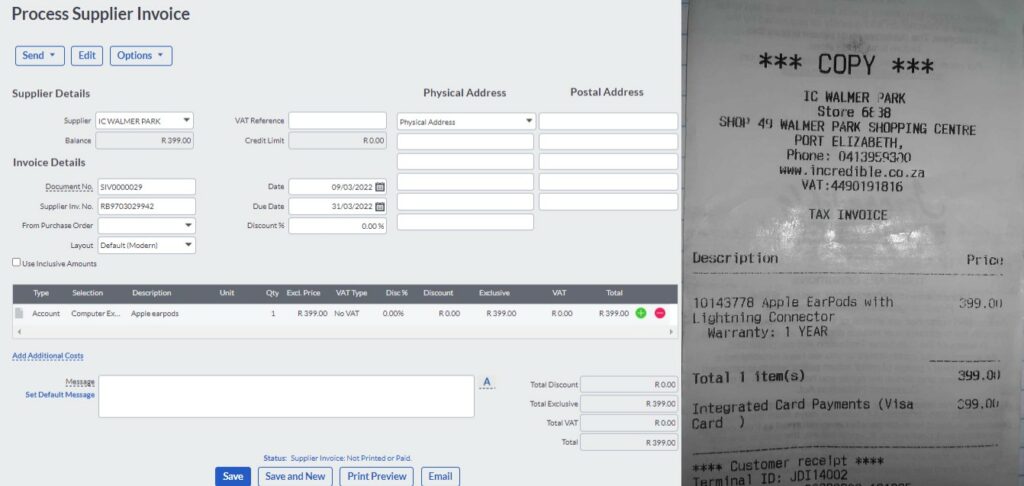
Testing Step 6: Compare & verify transaction
To verify that the transaction was accurate, valid and complete, you can compare it with the voucher uploaded in Dext like I have done below.
You can see that the supplier name, the general ledger account, description and amount agrees with my supplier’s voucher.
I have verified that Dext is integrated with Sage Business Cloud Accounting and that the publishing of a transaction from Dext to Sage is accurate, valid and complete.