In this guide we cover the intricacies of how to run payroll and process payroll taxes using Sage Business Cloud Payroll.
This comprehensive post should be followed with the Youtube video below ?which will optimise your experience on navigating the essential steps to manage your payroll processes, ensuring accuracy and compliance with ease.
Whether you are setting up a new company, managing employee details, or processing payroll taxes, this guide covers it all in detail.?
Setting Up a New Company in Sage Business Cloud Payroll
The journey begins with setting up a new company within Sage Business Cloud Payroll. This initial step is crucial as it lays the foundation for all subsequent payroll activities. Here’s a detailed breakdown of what you need to do:
- Company Registration Number and Name: Start by entering the official registration number and name of your company. This information is fundamental to distinguish your business in the payroll system.
- PAYE Reference Number: This is your SARS employer registration number. Ensure it is correct to avoid any invalid number messages. This number is essential for tax reporting and compliance.
- Auto-completion of SDL and UIF Numbers: One of the convenient features of Sage Business Cloud Payroll is that after entering the PAYE number, the system automatically completes the SDL and UIF numbers. This saves time and ensures accuracy.
- Trade Classification: Enter the appropriate trade classification code for your business activities. For example, code 2572 represents “other business services.” Selecting the correct code is vital for industry-specific reporting and compliance.
- UIF Registration Number: This number, registered with the Department of Labour’s Unemployment Insurance Fund, is different from the SARS UIF collection number. It is crucial to ensure both numbers are accurate for proper UIF contributions.
- Standard Industry Classification: From the menu, select the most appropriate industry category for your business. There are numerous codes to choose from, and selecting the correct one helps in categorizing your business correctly.
- Employment Tax Incentive (ETI) Scheme: If your business does not qualify for the ETI scheme, select the reason from the provided options. If it does qualify, leave the selection as ‘Not Selected.’
- Special Economic Zones: Indicate if your business operates in one of the six Special Economic Zones. These zones offer certain tax incentives and benefits, and it’s important to correctly identify if your business is located in one of these areas.
- Physical and Postal Address: Complete the fields for your business’s physical address. If the postal address is the same, it will auto-populate when you tick the ‘Default from physical address’ box. This ensures all correspondence is accurately directed.
- Contact Person with SARS: Enter the details of the contact person responsible for submitting returns to SARS. This person will be the point of contact for any tax-related queries.
- UIF Contact Person: If the UIF contact person is the same as for SARS, tick the box for quick completion. This ensures that the right person is contacted for UIF matters, streamlining communication.
- Adding the Company Logo: Upload your company’s logo to enhance the appearance of reports and employees’ payslips. A professional-looking logo adds credibility and branding to your documents.
A quick review confirms that all the required fields have been completed, and the final action is to save these settings. And just like that, the company is set up and ready to roll in Sage Business Cloud Payroll!
Easy payroll steps with Sage’s 6-Step guide
One of the most helpful features on this page is the ‘Pay Cycle Status,’ found as you scroll down. This feature includes 6 steps that can guide you through the payroll process, making it especially valuable if you’re not very experienced with payroll tasks.
To understand these steps in detail and how they can assist you, refer to our previous blog post where the 6 steps are covered comprehensively.?
?https://thefunaccountant.com/easy-payroll-steps-with-sages-6-step-guide/
Streamline Onboarding with the Employee Take-On Form
Sage Business Cloud Payroll provides a useful tool called the Employee Take-On Form, designed to streamline the onboarding process by allowing new employees to input all necessary details themselves, thereby reducing your administrative workload.
To access this form, from the Sage Payroll software:
- navigate to ‘Reports’ at the top of the screen,
- then select ‘Employee’ in the left sidebar, and
- finally click on ‘New Employee Form.
- ‘ Click ‘Preview’ to view the form. It is neatly organized with all the required fields to be filled in and
- can be saved in PDF format for printing or sending it to your employee.
Additionally, you can download the form directly from The Fun Accountant website via the link below:?
???https://resources.thefunaccountant.com
Managing Employee Details
The next step involves adding and managing employee details. Accurate employee information is vital for efficient payroll processing. Here’s how you can do it:
- Employee Information: Start by adding basic employee information, including their ID number, contact details, and employment start date. This foundational data is critical for all payroll calculations and reporting.
- Contractual Hours and Salary: Define the contractual hours and salary rate for each employee. This ensures that the payroll system calculates wages accurately based on the agreed terms.
- Employment Tax Incentive (ETI): Check eligibility for the ETI scheme and apply it if applicable. This can provide significant tax benefits for eligible employees.
- Leave Setup: Configure leave policies according to company policies and in compliance with the Basic Conditions of Employment Act. Accurate leave tracking is essential for payroll calculations and employee satisfaction.
- Benefit Funds: Set up benefit funds such as Pension Funds, Provident Funds, and Retirement Annuity Funds before adding employees to ensure a smooth process. This step ensures that all employee benefits are accounted for and managed correctly.

Running Payroll
With the company and employee details set up, you can now proceed to run payroll. Sage Business Cloud Payroll simplifies this process through its intuitive interface and automation features.
It’s important to realize that the payroll run itself is quite simple—the real effort lies in the setup. Once that’s complete, executing the payroll run becomes straightforward.
Here’s a step-by-step guide:
1. Configuring employee specific Payslip Data
The rest of the payroll setup occurs on the Employee Payroll screen.
Private Retirement Annuity Funds (RAF’s)
As part of setting up benefit funds, it’s crucial to configure private retirement annuity funds, which are managed by employees themselves. Employers need to know the:
- monthly contribution amount,
- the start date of these contributions, and
- the fund’s clearance number.
After entering these details, click ‘Save’.
Medical Aid
Next, set up Medical Aid for employees. The system automatically calculates the medical aid tax credit depending on the number of dependents covered by the employee’s medical aid fund. This ensures all tax benefits are accurately reflected in the employee’s payroll.
2. Adding Additional Company Benefits
Adding other company benefits, such as a travel allowance, is straightforward. Navigate to ‘Earnings’ and click on the plus sign to add a new earnings type. Select ‘Travel Allowance’ and specify the amount to be paid monthly. After pressing ‘OK’, the travel allowance will automatically appear on the payslip each month.
To add a 13th cheque, click the plus sign sign next to ‘Earnings’ and select ‘Annual Bonus.’ Check the box to enable the 13th cheque and choose when it should be paid. For example it can be paid in the employee’s birthday month. Taxes can be spread out evenly over the year as an increased deduction to avoid a large tax deduction at once during the bonus month.
Save these settings.
3. Configuring Deductions and Pension Fund
PAYE, UIF & SDL

In the Deductions section, Tax, UIF, and SDL are automatically calculated based on the earnings and allowable deductions.
Pension Fund
To set up the pension fund, expand the list of deductions and select ‘Pension Employee Contribution.’ The previously added Fund will appear for selection.
Upon selection, details of both employee and employer contributions are displayed, including the base earnings and contribution percentages.
Choose the start date for pension contributions and save the settings.
Note that pension fund contributions affect the employee’s tax, as they are an allowable tax deduction.
4. Generate Payslips
Automatically generate payslips for all employees based on the entered data.
The payslip details the amounts deducted for taxes, and other statutory and voluntary deductions such as pension contributions and UIF. This transparency helps employees understand how much of their earnings are allocated to these deductions, serving as a vital record for personal financial management and tax filing.
Additionally, payslips include information about company benefits that contribute to the total cost to the company for an employee, which is important for employees to understand their benefits usage.
5. Setting Up an Hourly Paid Employee
Up until now, we’ve focused on setting up payroll for an employee with a fixed monthly salary, ensuring consistent monthly payments. Now, let’s explore how to set up payroll for an hourly paid employee, where the pay is based on the number of hours worked.
This setup is particularly useful for businesses employing part-time workers or those with varying weekly hours, utilizing a timekeeping system to track hours worked.
- Access Employee Setup: Navigate to the employee setup section.
- Select Hourly Pay: Choose the option for hourly paid employees.
- Input Hourly Rate: Enter the hourly rate agreed upon with the employee.
5.1 Entering Hours and Overtime for Hourly Paid Employees
We have completed the setup using all options available in the master file setup. The remainder of our payroll setup occurs under the ‘Payslip’ section.
Since we configured the system to require hours for processing payroll, we need to enter both normal and overtime hours worked by the employee, typically obtained from a timekeeping register or an automated system.
Enter Normal Working Hours
- Basic Salary: Enter the normal working hours for the month under ‘Basic Salary’. For instance, input 160 hours. The system will automatically calculate the pay based on the hourly rate entered earlier in Employee Details.
- Verify the details and press ‘OK’.
Enter Overtime Hours
- Normal Overtime: Click the ‘+’ next to ‘Earnings’. Enter normal overtime hours, paid at 1.5 times the regular rate. For example, add 8 hours of overtime and press ‘OK’.
- Double Overtime: Enter hours worked on Sundays and public holidays at double the regular rate. For instance, input 16 hours of double overtime and press ‘OK’ to finalize.
This ensures accurate earnings calculations based on the actual hours worked, including any overtime.
6. Review and Validate Payroll reports

Generate and review essential payroll reports such as the Pay Register Report, Year to Date Detail Report, and Medical Aid Report to ensure all payroll activities are accurately recorded. These reports are vital for internal audits and external compliance.
7. Process Payroll Taxes

Accurate tax calculation is critical to avoid penalties and ensure compliance. Sage Business Cloud Payroll ensures that payroll taxes including PAYE, UIF, and SDL contributions are accurate and compliant with current regulations.
7.1 Submit EMP201 Declarations
Submit EMP201 declarations to SARS through the efiling system.
Processing Employee Payments with Netcash
We’ve completed a payroll run and processed payroll taxes. What about paying your employees?
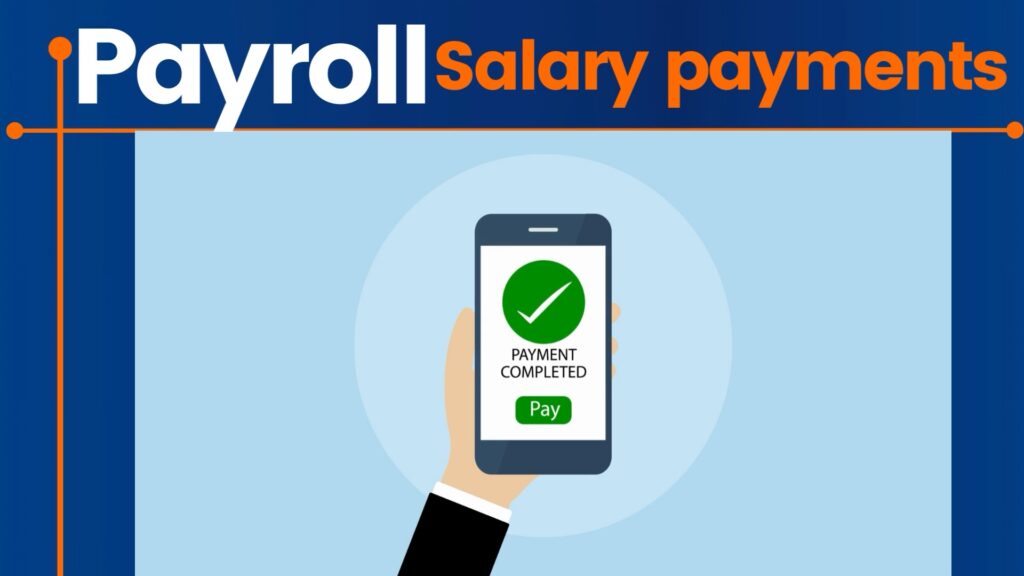
Back at the Financial Report Menu, explore the Net Pay List, which provides each employee’s payment method, bank details, and net pay for the month.
Introducing Netcash Salary Payments
One of the standout features of Sage Business Cloud Payroll is its integration with Netcash, which simplifies the process of paying employees. The process is simple, secure, and effortless, requiring no further input into your bank account. Regardless of the bank or number of payments, Netcash ensures everyone is paid on time, giving you peace of mind.
Here’s how you can use Netcash for salary payments:
- Setup Netcash Integration: Navigate to the Netcash section within Sage Business Cloud Payroll and enter your Netcash login credentials.
- Create Salary Batches: Generate salary batches for employees whose payment method is set to Netcash.
- Validate Payment Information: Netcash retrieves and validates the payment information for each employee.
- Submit Payment File: Click the ‘Make Payment’ button to submit the payment file to Netcash. A confirmation message will indicate successful submission.
- Authorize Payments: Log in to Netcash, review the salary batch, and authorize the payment. The funds will be transferred to employees’ bank accounts on the specified payment date.
The seamless integration of Netcash with Sage Business Cloud Payroll offers a powerful solution for managing your payroll and ensuring timely payments to your employees.
With Sage handling the payroll run, you can efficiently calculate and process payroll taxes, generate essential reports, and prepare salary batches.
Netcash takes over by securely handling the payment process directly from the payroll software, eliminating the need for manual entries and reducing the risk of errors.
Conclusion
Setting up and managing payroll with Sage Business Cloud Payroll is straightforward when you follow these steps.
Sage Business Cloud Payroll simplifies the entire process, from setting up new employees to processing payroll taxes and ensuring timely payments with Netcash.
By mastering how to run payroll and process payroll taxes, you can streamline your payroll operations, making payroll easy quick and precise and compliant.
Don’t be scared—step into the Cloud payroll world. You might be surprised at how easy it can be.
???Here is a 30-day free trial to get your hands into the mix of payroll things. ???

